

Introduction: Beyond the CrashLoopBackOff
In the world of cloud-native computing, few sights are as common—or as frustrating—as the dreaded CrashLoopBackOff status in Kubernetes. Your application, neatly packaged in a container, is failing, restarting, and failing again in a relentless cycle. In a traditional virtual machine environment, you might SSH in, check logs, and run diagnostic tools. But in the ephemeral, distributed, and often minimalist world of Kubernetes, these familiar debugging techniques fall short. This challenge is amplified by the rise of “distroless” container images, which enhance security and reduce size by stripping out everything but the application and its direct dependencies—including the shell itself.
How do you debug an application when you can’t even get a command prompt inside its container? This is the central question facing modern developers and SREs. The answer lies in evolving our debugging strategies to match the sophistication of our infrastructure. Effective Kubernetes debugging is a multi-faceted skill, blending foundational command-line inspections with advanced, non-invasive techniques. This comprehensive guide will walk you through the entire spectrum of Kubernetes debugging, from basic health checks to the powerful capabilities of ephemeral debug containers, providing you with the tools and knowledge to troubleshoot even the most elusive bugs in your distributed systems.
Section 1: The Foundations of Kubernetes Inspection
Before diving into advanced techniques, it’s crucial to master the fundamental tools that Kubernetes provides for introspection. These commands are your first line of defense and can often resolve a majority of common issues without needing to access the container directly. Think of this as gathering the initial evidence at the scene of the crime.
The “First Responders”: Describe, Logs, and Events
When a Pod is misbehaving, your initial investigation should always start with three core kubectl commands. These commands provide a high-level overview of the Pod’s state and its recent history within the cluster.
kubectl describe pod <pod-name>: This is your most important initial command. It provides a detailed snapshot of the Pod’s configuration and, most critically, its recent Events. The Events section at the bottom of the output often tells you exactly why a Pod is failing, such as image pull errors (ImagePullBackOff), failed volume mounts, or failed liveness/readiness probes.kubectl logs <pod-name>: This command streams the standard output (stdout) and standard error (stderr) from the container. It’s the equivalent of checking application logs. For a Pod that is crash-looping, you can use the--previousflag (kubectl logs --previous <pod-name>) to retrieve logs from the last terminated instance of the container, which is often where the fatal error message resides.kubectl get events --sort-by='.lastTimestamp': Whiledescribeshows events for a specific Pod, this command shows events across the entire namespace. It can help you correlate a Pod failure with a broader cluster issue, like a Node becoming unresponsive or a persistent volume failing to attach.
Interactive Debugging with kubectl exec
When logs and events aren’t enough, your next instinct is to get a shell inside the running container. The kubectl exec command allows you to do just that, providing an interactive terminal session inside the container’s namespace.
This is incredibly useful for checking the container’s filesystem, verifying environment variables, or testing network connectivity from within the Pod. For example, you can check if your application can reach a database:
# Get an interactive shell inside a running pod
kubectl exec -it my-app-pod-xyz123 -- /bin/sh

# Once inside the shell, you can use tools available in the container
# For example, check environment variables
printenv

# Or test network connectivity to a database service
ping my-database-service
However, kubectl exec has a critical limitation: it requires a shell (like /bin/sh or /bin/bash) and any desired debugging tools (like ping, curl, or ps) to be present in the container image. This is where modern, security-hardened distroless images present a major roadblock.
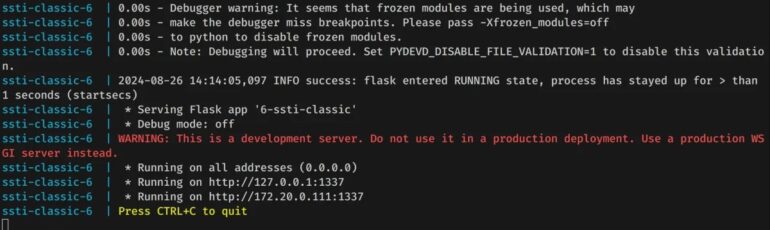
Section 2: No Shell, No Problem: Debugging Distroless Containers
Kubernetes logo – Google Logo, Kubernetes, Computer Software, Docker, Microsoft …
Distroless container images are a best practice for production environments. They are built on the principle of least privilege and contain only your application, its language runtime, and necessary libraries. This drastically reduces the attack surface and minimizes image size. The trade-off is that they contain no shell, no package manager, and no standard Linux utilities, rendering kubectl exec useless. This is where ephemeral containers come to the rescue.
The Power of Ephemeral Debug Containers
Introduced as a native feature in Kubernetes v1.23 (beta), an ephemeral container is a temporary container that you can attach to a running Pod. This debug container runs alongside your application containers and, crucially, shares the same process (PID), network, and IPC namespaces. This means it can inspect the application’s processes, analyze its network traffic, and access its filesystem as if it were running inside the main container, all without being part of the original Pod specification.
You can inject a feature-rich debug image (like busybox or nicolaka/netshoot) that contains all the diagnostic tools you need, effectively circumventing the limitations of a distroless base image.
Using kubectl debug in Practice
The kubectl debug command provides a streamlined interface for creating and attaching ephemeral containers. Let’s say you have a pod named my-distroless-app-abc456 running a Go application in a distroless image, and you suspect a network issue.
You can attach a debug container with network tools like this:
# Attach an ephemeral container to a running pod
# The 'nicolaka/netshoot' image is packed with networking tools
kubectl debug -it my-distroless-app-abc456 \
  --image=nicolaka/netshoot \
  --share-processes \
  -- /bin/bash

# Once attached, you are in the shell of the *debug container*,
# but you can see the processes of the application container.
#
# List all processes in the Pod's PID namespace
ps aux

# Use 'dig' to test DNS resolution for a Kubernetes service
dig my-api-service.default.svc.cluster.local

# Use 'tcpdump' to inspect traffic on the Pod's network interface
tcpdump -i eth0 -n port 8080
The --share-processes flag is key, as it allows the debug container to see and interact with the processes of the target container. This powerful, non-invasive technique is the modern solution for live, production debugging in Kubernetes without compromising the security benefits of minimalist container images.
Section 3: Advanced Kubernetes Debugging Scenarios
With foundational and modern techniques in hand, let’s explore how to apply them to specific, often complex, debugging scenarios that arise in microservices architectures.
Tackling Network and Connectivity Issues
Network problems are among the most difficult to debug in Kubernetes. Is it a DNS failure? A restrictive NetworkPolicy? A misconfigured Service? Using a debug container with a suite of network tools is the best way to diagnose these issues from the perspective of the affected Pod.
Another indispensable tool is kubectl port-forward. It creates a secure tunnel from your local machine directly to a port on a specific Pod, bypassing the Service and Ingress layers. This is perfect for API debugging or directly connecting a local database client to a database running in the cluster.
Kubernetes logo – Google Logo, Kubernetes, Docker, Computer Software, Software …
# Forward local port 8080 to port 80 on the 'my-backend-pod'
kubectl port-forward pod/my-backend-pod 8080:80
# Now, in another terminal, you can send requests to your local machine
# and they will be securely forwarded to the pod in the cluster.
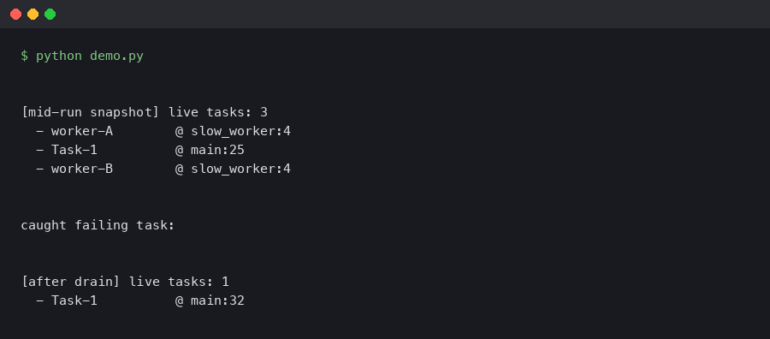
curl http://localhost:8080/api/v1/healthSolving the CrashLoopBackOff Puzzle
What if a Pod is crashing so fast that you don’t even have time to attach a debug container? This is a classic chicken-and-egg problem. The Pod needs to be running to be debugged, but it can’t run because of an error.
The solution is to create a copy of the failing Pod but override its entrypoint command to prevent it from starting (and crashing) the application. The kubectl debug command can do this elegantly by creating a new Pod based on the original’s specification.
# Create a copy of the 'failing-pod' named 'failing-pod-debug'
# and override its container's command to sleep indefinitely.
# This keeps the container running so we can inspect it.
kubectl debug failing-pod -it --copy-to=failing-pod-debug -- /bin/sh

# The command above will create the new pod and immediately drop you
# into a shell inside its container.
#
# From here, you can manually run the original application command
# to see the error, check configuration files, or examine the filesystem.
Remote Debugging with Telepresence
For complex application logic bugs, you often need a full-fledged debugger. Tools like Telepresence take Kubernetes debugging to the next level. Telepresence works by deploying a two-way network proxy that effectively “swaps” a deployment in the cluster with a process running on your local machine. This allows you to run your service locally, connected to your favorite IDE and debugger (like VS Code or PyCharm), while it continues to interact with other services inside the Kubernetes cluster as if it were running there. This provides an unparalleled “inner loop” development and debugging experience for microservices.
Section 4: Best Practices for a Debuggable System
The most effective debugging strategy is a proactive one. Building debuggability into your system from day one will save countless hours of troubleshooting down the line. Here are some key best practices.
Embrace Comprehensive Observability
Kubernetes logo – White and blue ship wheel illustration, Kubernetes Logo, icons …
Reactive debugging is essential, but a strong observability posture can help you prevent issues or find them faster.
- Structured Logging: Don’t just print plain text. Log in a structured format like JSON. This makes logs machine-readable, searchable, and easy to filter in logging platforms like Grafana Loki, Elasticsearch, or Splunk.
- Metrics: Instrument your application to expose key performance indicators (e.g., latency, error rates, saturation) in a format like Prometheus. This helps you spot anomalies and performance degradation.
- Distributed Tracing: In a microservices architecture, a single user request can traverse dozens of services. Distributed tracing (using tools like Jaeger or OpenTelemetry) allows you to visualize the entire lifecycle of a request, pinpointing bottlenecks and errors with precision.
Design Debug-Friendly Containers and Probes
While distroless images are ideal for production, consider using multi-stage Dockerfiles. This allows you to build a lean production image from one stage and a separate, larger debug image (with shell and tools) from another stage for use in development and staging environments.
Furthermore, configure your Liveness, Readiness, and Startup probes thoughtfully. A poorly configured liveness probe can kill a container that is simply slow to start, leading to a CrashLoopBackOff loop that masks the real underlying issue. Ensure probes have appropriate timeouts, failure thresholds, and initial delay settings.
Conclusion: A Modern Approach to Troubleshooting
Kubernetes debugging has evolved far beyond simply checking logs. The modern toolkit for a cloud-native engineer is a powerful combination of foundational inspection commands, advanced runtime debugging with ephemeral containers, and sophisticated remote development tools. The days of being blocked by a missing shell in a distroless container are over.
By mastering tools like kubectl describe, logs, and the versatile kubectl debug, you can effectively diagnose issues at any level of the stack. More importantly, by adopting a proactive mindset—building observable systems with structured logging, metrics, and tracing—you shift from being a reactive bug fixer to an architect of resilient, transparent, and debuggable applications. The next time you face a failing Pod, you’ll be equipped not just to solve the immediate problem, but to build a more robust system for the future.