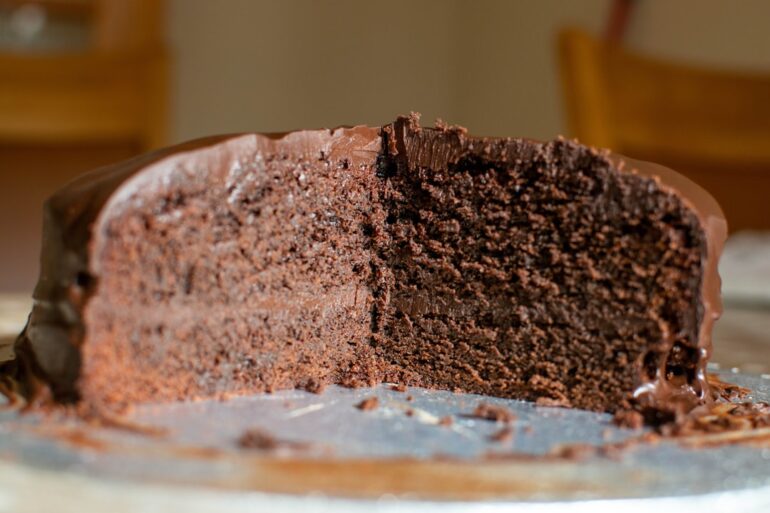

As the winter chill settles in, few things offer the same comforting embrace as a warm, decadent beverage. The rich aroma of freshly brewed coffee mingling with the luxurious scent of melting chocolate creates a sensory experience that is both invigorating and deeply soothing. This is the magic of Winter Chocolate Coffee, a drink that transcends a simple recipe to become a ritual. It’s a moment of pause, a reward after a long day, and the perfect companion for a quiet afternoon with a good book. But crafting the perfect cup is an art form, a delicate balance of flavors and textures that requires more than just mixing ingredients. It’s a process of refinement, adjustment, and personalization—a journey of delicious discovery.
In many ways, perfecting your signature Winter Chocolate Coffee is akin to the meticulous process of software debugging. You start with a base formula (your code), but the true magic happens in the iterative process of testing, identifying “bugs” (an imbalance in flavor), and applying fixes until you achieve a flawless result. This guide will not only provide you with a foundational recipe but also walk you through the advanced debugging techniques needed to elevate your beverage from good to unforgettable. We will explore the core components, troubleshoot common issues, and delve into creative variations, treating your kitchen as a development environment and your taste buds as the ultimate error tracking tool.
The Core Architecture: Understanding Your Ingredients
Before we can begin the process of code debugging, we must first understand the fundamental building blocks of our application. In this case, that means a deep dive into the three key ingredients: coffee, chocolate, and milk. The quality and character of each will profoundly impact the final product, much like how the choice of a programming language or framework defines a software project.
1. The Coffee: Your Backend Logic
The coffee is the engine of this beverage, providing the foundational flavor, caffeine kick, and aromatic depth. Your choice here is critical and sets the stage for everything else.
- The Roast: A medium to dark roast is generally preferred for chocolate coffee. A dark roast offers bold, smoky, and often chocolatey notes that complement the added chocolate perfectly. A medium roast provides a more balanced profile, allowing the specific notes of the bean (fruity, nutty, earthy) to shine through. A light roast, with its higher acidity, can sometimes clash with the richness of the chocolate, creating a “bug” in the flavor profile that requires careful backend debugging.
- The Brew Method: How you brew your coffee is like choosing your server architecture.
- Espresso: The gold standard. A shot or two of espresso provides a concentrated, intense coffee flavor that stands up beautifully to milk and chocolate. This is your high-performance, optimized build.
- French Press: This method produces a full-bodied, robust coffee with more oils, which adds to the drink’s overall richness and mouthfeel. It’s a reliable choice for solid, foundational flavor.
- Drip Coffee/Pour-Over: For a cleaner, lighter body, a strong batch of drip or pour-over coffee works well. You’ll want to brew it stronger than usual to ensure the coffee flavor isn’t lost. Think of this as a lightweight microservice that needs to be potent to do its job.
Mastering your coffee component is the first step in successful Python development or Node.js development; get the core logic right, and the rest of the process becomes much smoother.
2. The Chocolate: Your Frontend Framework

The chocolate defines the user experience of the drink. It dictates the sweetness, richness, and texture. This is your user interface, and effective frontend debugging is key to a satisfying result.
- Type of Chocolate:
- Dark Chocolate (60-75% cacao): This is the enthusiast’s choice. It provides a deep, complex, and less sweet flavor that balances the coffee’s bitterness. Using high-quality dark chocolate is like using a well-structured framework like React or Angular; it requires skill to balance but yields a sophisticated result. Perfecting this requires careful React debugging of the flavor balance.
- Semi-Sweet Chocolate (40-60% cacao): A great all-around option that offers a pleasant balance of sweetness and rich cocoa flavor. It’s more forgiving and a good starting point for your initial “build.”
- Milk Chocolate: For those with a sweet tooth, milk chocolate creates a creamier, sweeter, and more nostalgic hot-chocolate-like flavor. This is your user-friendly, component-based library like Vue.js, making for a very approachable final product.
- Cocoa Powder: Unsweetened cocoa powder can be used for a potent chocolate flavor without adding much sweetness, giving you more control. Be sure to whisk it thoroughly to avoid lumps, a common “UI bug.”
- Form Factor: Use finely chopped chocolate from a quality bar or high-quality chocolate chips (callets). These melt more evenly than large chunks, preventing textural inconsistencies. This is a fundamental principle of debugging best practices—start with clean, well-structured components.
3. The Milk: Your Infrastructure and Deployment Environment
The milk is the canvas upon which the coffee and chocolate flavors are painted. It binds the elements together and determines the final texture and richness of the drink. This is your infrastructure, and issues here can affect the entire system.
- Dairy Options: Whole milk is the classic choice for its creamy texture and ability to create a stable, velvety foam. For an even more decadent experience, you can substitute a portion of the milk with heavy cream or half-and-half. This is like scaling up your servers for better performance.
- Non-Dairy Options: Oat milk is a fantastic alternative, known for its creamy consistency that closely mimics dairy milk. Almond milk works but can be thinner; look for a “barista blend.” Soy and coconut milk also offer unique flavor profiles that can add another layer of complexity. When using alternatives, you may need to engage in some Docker debugging, ensuring your “container” (the milk) properly supports the “application” (the coffee and chocolate).
The Master Recipe: Your Version 1.0
Here is a well-tested, stable build for your Winter Chocolate Coffee. Think of this as your initial commit—a solid foundation upon which you can iterate and improve.
[recipe servings=”2″ time=”15 mins” difficulty=”Easy” description=”A foundational recipe for a rich and decadent Winter Chocolate Coffee, perfect for debugging and personalization.”]
[recipe-ingredients]
- 400ml (approx. 1 3/4 cups) Whole Milk (or preferred milk)
- 80g (approx. 1/2 cup) High-Quality Dark or Semi-Sweet Chocolate, finely chopped
- 240ml (approx. 1 cup) Strongly Brewed Hot Coffee or 2-4 shots of fresh Espresso
- 1-2 tsp Sugar or Maple Syrup (optional, to taste)
- 1/4 tsp Vanilla Extract
- A tiny pinch of Salt
[/recipe-ingredients] [recipe-directions]
- Prepare Your Environment: Brew your coffee or pull your espresso shots. Finely chop your chocolate and have all other ingredients measured and ready. A clean workspace is the first step in effective web development tools management.
- Melt the Chocolate: In a small saucepan, gently heat the milk over medium-low heat until it is warm and steaming, but not boiling. Scalded milk is a critical “production error.” Add the chopped chocolate to the warm milk.
- Integrate the Components: Let the chocolate sit in the warm milk for a minute to soften, then begin whisking continuously until the chocolate is completely melted and the mixture is smooth and homogenous. This step is crucial; failure to integrate properly is a common point for integration debugging.
- Deploy the Core Logic: Slowly pour the hot coffee or espresso into the chocolate milk mixture, whisking constantly. This is where your backend and frontend meet. Continue to heat gently for another minute, but do not let it boil.
- Final Polish and Debugging: Remove from heat and stir in the vanilla extract, the pinch of salt (this enhances the chocolate flavor), and sweetener if desired. Taste it. This is your first “unit test.” Use your debug console (your palate) to assess the result.
- Serve: Pour into two warmed mugs. Garnish with whipped cream, a dusting of cocoa powder, or chocolate shavings if desired.
[/recipe]

The Refinement Process: Advanced Debugging Techniques
Your first cup is good, but is it perfect? Now begins the real work of full stack debugging. We must analyze the output, identify flaws, and apply targeted fixes. This iterative process of testing and debugging is what separates a novice from an expert.
Troubleshooting Common Bugs and Errors
A bitter aftertaste or a watery texture is not a failure; it’s an error message. Understanding these stack traces of flavor allows us to trace the problem back to its source and implement a fix.
- The Bug: Too Bitter or Acidic.
- Error Analysis: This is a classic JavaScript error in flavor balance. The likely culprits are over-extracted or overly acidic coffee, or chocolate that is too dark for your palate.
- The Fix:
- Add a tiny bit more salt. Salt is a brilliant “debugger” for bitterness.
- Increase the amount of milk or add a splash of cream to add fat and mellow the flavors.
- Add a small amount of sweetener.
- Next time, use a smoother, less acidic coffee bean or a chocolate with a lower cacao percentage. This is a form of code refactoring.
- The Bug: Watery or Thin Texture.
- Error Analysis: This is a performance issue, indicating a lack of richness. This is where memory debugging comes in, ensuring you have enough “substance.”
- The Fix:
- Use whole milk or add a splash of heavy cream. Fat is your friend here.
- Ensure you are using enough chocolate. The ratio of chocolate to liquid is key.
- Try adding a teaspoon of cornstarch (mixed with a tablespoon of cold milk first to make a slurry) to the mixture while heating to thicken it. This is like adding a debug library to solve a specific problem.
- The Bug: The Drink is Grainy or Separated.
- Error Analysis: This is an integration failure, often seen in microservices debugging where two components fail to connect smoothly. The chocolate has not fully emulsified with the milk, likely due to improper temperature or insufficient agitation.
- The Fix:
- Use finely chopped chocolate for faster, more even melting.
- Ensure your milk is warm enough to melt the chocolate but not so hot that it causes the fats to separate. A gentle, consistent heat is key.
- Whisk vigorously and constantly. An immersion blender on low can also be a powerful debug tool to create a perfectly smooth emulsion.
Advanced Tools and Best Practices
Just as a developer relies on powerful IDEs and developer tools, a beverage artisan can benefit from precision instruments. Using Chrome DevTools is essential for web debugging; similarly, using a kitchen scale and thermometer is crucial for drink perfection.
- Precision Measurements: Use a kitchen scale to measure your chocolate and coffee. This consistency is the foundation of CI/CD debugging, ensuring every build (or cup) is the same.
- Temperature Control: Use a thermometer to keep your milk around 70°C (160°F). This is the sweet spot for melting chocolate without scalding the milk. This is a form of proactive error monitoring.
- Logging and Analysis: Keep a small notebook. When you make a change, write it down. This practice of logging and debugging helps you track what works and what doesn’t, accelerating your path to the perfect recipe.
Expanding the Feature Set: Frameworks and Variations
Once you have a stable “master branch,” you can start creating new “feature branches” with exciting variations. Each variation presents its own unique challenges, requiring specific debugging frameworks knowledge.
- Spiced Aztec Mocha (Django Debugging): Add a pinch of cinnamon and a tiny pinch of cayenne pepper to the melting chocolate. The challenge here, much like in complex Django debugging, is balancing the warmth of the cinnamon with the kick of the cayenne without overpowering the core flavors.
- Peppermint Chocolate Coffee (React Debugging): Add 1/4 teaspoon of peppermint extract at the very end. Be careful; peppermint is a powerful component, and adding too much can break the entire “application.” This requires careful state management.
- Salted Caramel Coffee (Express Debugging): Drizzle caramel sauce into the mug before pouring the coffee. Top with whipped cream and a sprinkle of flaky sea salt. The “middleware” (caramel) must be integrated correctly to enhance, not disrupt, the primary request-response cycle of coffee and chocolate.
- Orange Zest Mocha (Angular Debugging): Add a strip of fresh orange zest to the milk while it heats, and remove it before adding the coffee. The subtle citrus oil infusion adds a bright, sophisticated top note, a complex dependency that requires careful handling, similar to Angular debugging.
Conclusion: Your Perfected, Production-Ready Brew
Creating the ultimate Winter Chocolate Coffee is a journey that mirrors the thoughtful, iterative process of modern software development. It begins with a solid foundation of quality components and a reliable base recipe. But the real mastery is found in the art of refinement—the careful process of testing and debugging, where you analyze the output, identify imperfections, and apply precise fixes. By embracing debugging best practices in your kitchen, you can troubleshoot any issue, from a bitter aftertaste to a thin texture, turning “bugs” into features.
Whether you’re engaging in complex full stack debugging to balance spices and toppings or simple unit test debugging to perfect your chocolate-to-milk ratio, each adjustment brings you closer to your ideal cup. So embrace the process. Experiment with different “frameworks,” use your “debug tools” wisely, and don’t be afraid to iterate. The result will be more than just a drink; it will be a perfectly crafted, deeply personal, and incredibly delicious experience—your own bug-free, production-ready Winter Chocolate Coffee.