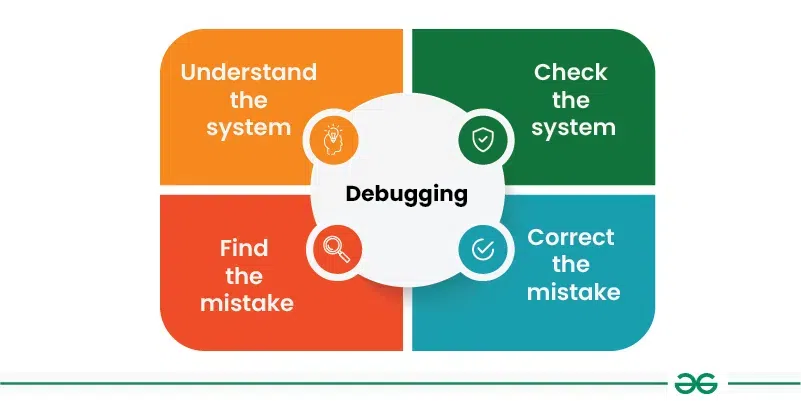
In the modern landscape of software development, writing code is only half the battle. The other half—often the more grueling half—is ensuring that code works correctly under every conceivable circumstance. Unit testing provides the safety net required for robust applications, but what happens when the net tangles? Unit test debugging is a critical skill that separates junior developers from senior engineers. It is not merely about fixing a failing test; it is about understanding the underlying logic, the state of the application, and the intricacies of the testing framework itself.
As applications grow in complexity, moving from monolithic architectures to microservices and serverless functions, the difficulty of software debugging increases exponentially. We are no longer just looking for syntax errors; we are hunting down race conditions in Node.js development, memory leaks in Python development, and state inconsistencies in React debugging. Fortunately, the tools at our disposal have evolved. From sophisticated IDE integrations to AI-driven code analysis, the modern developer has a powerful arsenal for bug fixing.
This comprehensive guide will explore the depths of debugging failed unit tests. We will move beyond the basic console.log approach to cover advanced debugging techniques, the integration of static analysis, handling asynchronous code, and optimizing your workflow for CI/CD debugging. Whether you are engaged in backend debugging with Django or frontend debugging with Vue, these strategies will transform your approach to error resolution.
The Anatomy of a Failure: Decoding Stack Traces and Assertions
The first step in effective unit test debugging is mastering the art of reading the error. When a test fails, the test runner provides a report containing the assertion error and the stack trace. While this seems obvious, many developers glance over the trace and immediately jump into the code. A disciplined approach to reading stack traces can save hours of aimless searching.
Understanding Assertion Errors
Assertion errors tell you what happened versus what you expected to happen. In Python debugging with frameworks like Pytest, or JavaScript debugging with Jest, the clarity of these messages is paramount. A generic “False is not True” message is useless. High-quality tests utilize descriptive assertions.
Consider a scenario where we are calculating financial metrics. A subtle bug in floating-point arithmetic can cause tests to fail intermittently.
import unittest

def calculate_roi(investment, return_amount):
    if investment == 0:
        raise ValueError("Investment cannot be zero")
    # Intentional bug: Floating point precision issue potential
    return (return_amount - investment) / investment * 100

class TestFinancialMetrics(unittest.TestCase):
    def test_roi_calculation(self):
        # This might pass
        self.assertAlmostEqual(calculate_roi(100, 110), 10.0)

        # This might fail depending on precision handling
        # Debugging Tip: Use assertAlmostEqual for floats, not assertEqual
        result = calculate_roi(100, 105.2)

        # A failure here requires inspecting the exact decimal value
        # The error message will show: 5.19999999999999 vs 5.2
        self.assertAlmostEqual(result, 5.2, places=2)

    def test_zero_investment(self):
        with self.assertRaises(ValueError) as cm:
            calculate_roi(0, 100)

        # Debugging the exception message
        self.assertEqual(str(cm.exception), "Investment cannot be zero")

if __name__ == '__main__':
    unittest.main()
In the example above, debugging best practices dictate that we look closely at the places parameter in the assertion. A failing test here isn’t necessarily a logic bug in the business rule, but a nuance of how the language handles math. Recognizing the difference between a logic error and a limitation of the data type is crucial in application debugging.
Navigating the Stack Trace
The stack trace is your map. In Node.js errors or Java exceptions, the trace shows the execution path leading to the crash. When debugging, follow the trace from the top (most recent call) down to your test file. The key is to identify the boundary between your code and the library code. If the error originates deep within a framework like Express or Spring Boot, the issue is likely how you passed data into that framework, not the framework itself.
Interactive Debugging and IDE Integration
Gone are the days when print debugging was the only option. While logging is useful, it requires modifying code and re-running tests. Modern IDEs (VS Code, IntelliJ, PyCharm) offer powerful developer tools for interactive debugging. This allows you to pause execution, inspect variables in real-time, and modify state on the fly.
Breakpoints and Conditional Execution
Setting a breakpoint stops the code execution at a specific line. However, in loops or frequently called functions, a standard breakpoint triggers too often. Conditional breakpoints are a game-changer for performance monitoring and debugging specific scenarios. You can tell the debugger to pause only when a specific variable equals a certain value (e.g., user_id == 1054).
Let’s look at a JavaScript development scenario using Jest. We want to debug a function that processes a list of users, but it only fails for one specific user data structure.

// userProcessor.js
const processUsers = (users) => {
    return users.map(user => {
        // Hypothetical bug: user.preferences might be undefined for legacy users
        if (user.isActive) {
            return {
                id: user.id,
                theme: user.preferences.theme || 'default', // CRASH HERE if preferences is missing
                role: user.role
            };
        }
        return null;
    }).filter(u => u !== null);
};

// userProcessor.test.js
describe('User Processor', () => {
    test('handles legacy users correctly', () => {
        const users = [
            { id: 1, isActive: true, preferences: { theme: 'dark' }, role: 'admin' },
            { id: 2, isActive: true, role: 'user' }, // Legacy user missing preferences
            { id: 3, isActive: false, role: 'guest' }
        ];

        // To debug this effectively in VS Code:
        // 1. Open the Debug panel.
        // 2. Set a breakpoint inside the map function.
        // 3. Right-click the breakpoint -> Edit Breakpoint -> Expression:
        //    "user.id === 2"
        // 4. Run the test in Debug mode.

        try {
            const results = processUsers(users);
            expect(results).toHaveLength(2);
            expect(results[1].theme).toBe('default');
        } catch (error) {
            // This catch block helps in logging the specific error during automated runs
            console.error('Test failed during processing:', error);
            throw error;
        }
    });
});
Using the conditional breakpoint described in the comments allows you to skip the successful iteration (User 1) and stop exactly where the crash occurs (User 2). This technique is invaluable in API debugging where you might be processing large JSON payloads.
Watch Windows and the Debug Console
Once paused, utilize the Debug Console. You can execute arbitrary code in the current context. This is useful for testing hypotheses without changing the source code. For example, you can type user.preferences to confirm it is undefined, then try user.preferences || {} to see if that fixes the logic. This immediate feedback loop significantly accelerates bug fixing.
Advanced Techniques: Async, Mocks, and AI Assistance
Unit test debugging becomes significantly harder when dealing with asynchronous operations (Promises, async/await) and external dependencies. This is common in full stack debugging, where frontend code calls backend APIs.
Debugging Asynchronous Code
A common pitfall in TypeScript debugging or JavaScript debugging is the “false positive” test—a test that passes because the assertion ran before the asynchronous operation completed. Conversely, tests might time out if promises are never resolved.
When debugging async tests, ensure you are properly awaiting results. If a test fails with a timeout, inspect the network debugging tab or your mock setup to ensure the “backend” is responding.
// apiService.ts
export const fetchUserData = async (id: number): Promise => {
    try {
        const response = await fetch(`https://api.example.com/users/${id}`);
        if (!response.ok) {
            throw new Error(`HTTP error! status: ${response.status}`);
        }
        return await response.json();
    } catch (error) {
        // Debugging Tip: Don't swallow errors silently in production code
        // Log it to an error tracking system
        console.error("Fetch error:", error);
        throw error;
    }
};

// apiService.test.ts
// Using Jest with TypeScript
import { fetchUserData } from './apiService';

// Mocking the global fetch
global.fetch = jest.fn();

describe('Async API Debugging', () => {
    beforeEach(() => {
        (global.fetch as jest.Mock).mockClear();
    });

    it('handles API failures gracefully', async () => {
        // Setup the mock to reject
        (global.fetch as jest.Mock).mockResolvedValueOnce({
            ok: false,
            status: 500,
            statusText: 'Internal Server Error'
        });

        // DEBUGGING STRATEGY:
        // If this test fails (e.g., says "Received function did not throw"),
        // use a try/catch block inside the test to inspect the actual behavior.

        try {
            await fetchUserData(99);
        } catch (e: any) {
            // We expect an error, so we can assert on it
            expect(e.message).toContain('HTTP error! status: 500');
            return; // Test passes
        }

        // If we reach here, the function didn't throw, which is a bug
        throw new Error('Expected fetchUserData to throw an error but it succeeded');
    });
});
In React debugging or Angular debugging, async utilities like waitFor or tick (in Angular) are essential. If a test fails regarding UI updates, it is often because the test checked the DOM before the microtask queue emptied.
Leveraging AI and Smart Analysis
The landscape of developer tools is shifting towards AI-assisted debugging. Modern tools integrated into Test Explorers can now analyze a failed test and propose a fix. These tools look at the stack trace, the variable state, and the source code to identify patterns.
For example, if a variable is null unexpectedly, AI tools can trace the data flow backward to find where it was supposed to be initialized. This is a form of automated dynamic analysis. While you should not blindly accept AI suggestions, they serve as an excellent “second pair of eyes,” especially for boilerplate code or complex regex errors in text parsing.
Environment, CI/CD, and Docker Debugging
One of the most frustration scenarios in software debugging is the “It works on my machine” problem. Tests pass locally but fail in the CI/CD pipeline. This usually points to environmental differences, such as OS-specific file paths, timezone differences, or missing dependencies.
Containerized Debugging
Docker debugging is essential here. If a test fails in CI, attempt to reproduce it by running the test suite inside a Docker container that mirrors the CI environment locally. This isolates the environment variables and filesystem structure.
Logging and Observability in Tests
In a CI environment, you cannot use interactive breakpoints. Here, logging and debugging strategies become vital. Configure your test runner to output verbose logs or generate XML reports (JUnit format) that can be parsed by the CI tool.
Below is an example of a configuration setup that helps debugging in CI environments by enabling detailed tracebacks and slow test reporting (useful for performance monitoring).
# pytest.ini configuration for better debugging context
[pytest]
# Show local variables in tracebacks
addopts = --showlocals --tb=short --durations=10

# Define markers to avoid warnings
markers =
    integration: marks tests as integration tests
    slow: marks tests as slow

# Logging configuration for capturing debug info during test runs
log_cli = true
log_cli_level = DEBUG
log_cli_format = %(asctime)s [%(levelname)8s] %(message)s (%(filename)s:%(lineno)s)
log_cli_date_format = %Y-%m-%d %H:%M:%S
With --showlocals, Pytest will print the values of all local variables in the stack trace when a test fails. This provides context that is often missing in standard CI logs, making remote debugging significantly easier.
Best Practices for Debuggable Tests
To make unit test debugging easier, you must write tests that are easy to debug. This involves Test-Driven Development (TDD) principles and clean coding practices.
1. Isolate Your Tests
Tests should not depend on each other. If Test A modifies a global state that causes Test B to fail, debugging becomes a nightmare. Use setUp/tearDown (or beforeEach/afterEach) to reset the state completely. This is crucial in database debugging and integration debugging.
2. One Assertion Per Logical Concept

While you can have multiple assertions in a test, they should verify the same logical outcome. If a test fails, you want to know exactly which part of the logic broke. Splitting complex tests into smaller, focused tests improves error monitoring.
3. Meaningful Mocking
Over-mocking can lead to tests that pass even when the system is broken (false positives). Under-mocking leads to brittle tests that fail due to external factors (network issues). Use libraries like Mockito (Java), unittest.mock (Python), or jest.mock (JS) to simulate boundaries, but ensure your mocks behave realistically.
4. Use Static Analysis Tools
Tools like ESLint, Pylint, or SonarQube act as a first line of defense. They perform static analysis to catch potential bugs (like unreachable code or unused variables) before you even run the tests. Integrating these into your editor helps prevent bugs rather than just fixing them.
Conclusion
Mastering unit test debugging is a journey that moves from staring at cryptic error messages to utilizing sophisticated debugging frameworks and AI assistants. By understanding the core concepts of assertions and stack traces, leveraging IDE features like conditional breakpoints, and adopting rigorous strategies for async and CI/CD environments, you can drastically reduce the time spent on bug fixing.
Remember, every failed test is an opportunity to improve the robustness of your application. Whether you are doing mobile debugging with Swift or backend debugging with Microservices, the principles remain the same: isolate the variable, reproduce the error, analyze the state, and fix the root cause. As tools continue to evolve, incorporating AI debugging features and better visualization tools will become standard practice, allowing developers to focus less on the “how” of debugging and more on the “why” of software architecture.