
I still remember the exact moment I realized I was wasting half my career staring at unhelpful text in a terminal window. I was three hours into debugging a complex state issue in a React application, scrolling through hundreds of lines of `console.log` output that all looked identical. Every time I refreshed the page, I had to mentally map the log order to the code execution, and frankly, I was losing my mind.
We all start there. The “log and pray” method is the first debugging technique we learn, and for many developers, it’s the last one they ever truly master. But here is the hard truth: if you are still relying solely on basic logging to fix complex asynchronous issues or data structure problems, you are working twice as hard as you need to.
I want to walk you through the debugging workflow I actually use daily. This isn’t a textbook definition of tools; this is a look at how I tackle broken code, messy APIs, and DOM elements that refuse to behave.
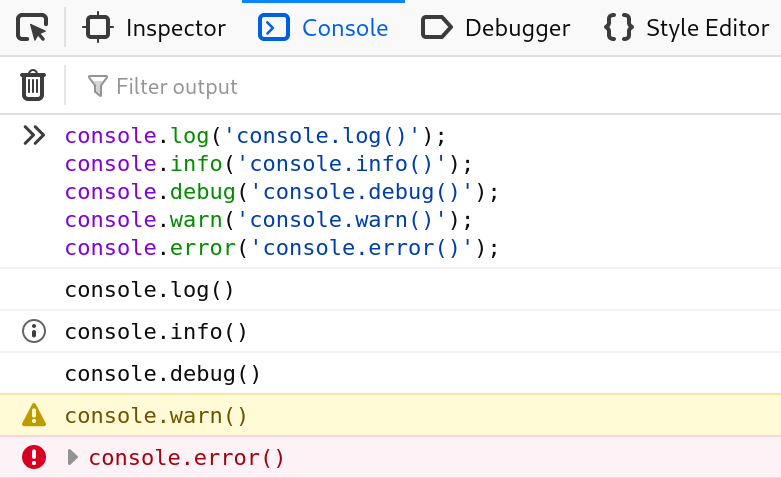
The Console Is Richer Than You Think
I see this constantly in code reviews: a developer needs to inspect an array of objects returned from an API, so they log it. Then, in the browser console, they have to manually click twenty little arrows to expand the objects just to see if the `id` or `status` property is correct.
I stopped doing that years ago. The console object has methods specifically designed to handle structured data, and ignoring them is a massive productivity killer.
My absolute favorite tool for data visualization is `console.table()`. If I have a list of users or products, logging them as a table changes the game completely. It transforms a nested mess into a clean, sortable grid.
const users = [
  { id: 1, name: 'Alice', role: 'Admin', status: 'Active' },
  { id: 2, name: 'Bob', role: 'User', status: 'Inactive' },
  { id: 3, name: 'Charlie', role: 'User', status: 'Active' },
  { id: 4, name: 'Dana', role: 'Editor', status: 'Pending' }
];

// The old, painful way
console.log('Users list:', users);

// The better way
console.table(users);

// You can even filter which columns you want to see
console.table(users, ['name', 'status']);
When I run this, I get an immediate visual snapshot. I can see at a glance if a status is wrong without clicking anything. It saves me seconds every time I run the code, which adds up to hours over a project.
Another command I use heavily is `console.dir()`. Have you ever tried to log a DOM element and just got the HTML string representation? That is rarely what I want when I’m checking properties like `className` or `childNodes`. `console.dir()` forces the browser to display the element as a JavaScript object, allowing me to inspect its internal properties.
const btn = document.getElementById('submit-btn');

// Logs the HTML structure: <button id="...">...</button>
console.log(btn);

// Logs the interactive object properties
console.dir(btn);
Structuring Logs for Sanity
When I am debugging a function that loops or runs recursively, a flat list of logs is useless. I lose track of which iteration I’m looking at. I use `console.group()` and `console.groupEnd()` to create a visual hierarchy in the console.
This is particularly useful when I am tracking the lifecycle of a component or a complex data transformation pipeline.
function processOrder(orderId, items) {
  console.group(`Processing Order: ${orderId}`);

  console.log('Validating items...');
  // Logic here

  console.group('Calculating totals');
  items.forEach(item => {
    console.log(`${item.name}: $${item.price}`);
  });
  console.groupEnd(); // Ends 'Calculating totals'

  console.log('Order complete.');
  console.groupEnd(); // Ends 'Processing Order'
}

processOrder(101, [{name: 'Widget', price: 20}, {name: 'Gadget', price: 15}]);
By nesting these groups, I can collapse entire sections of logs that aren’t relevant to the specific bug I’m hunting. It keeps my mental model clean.
The `debugger` Keyword: A Hard Stop

While fancy logs are great, sometimes I need to stop the world. I find that many developers are afraid of breakpoints because they feel “slower” than logging. I disagree. Setting up a log, saving the file, waiting for the rebuild, and refreshing the page takes time.
Inserting the `debugger` keyword directly into my code is often faster. It forces the browser (or Node.js inspector) to pause execution right at that line.
I use this extensively when I have conditional logic that isn’t behaving as expected. I don’t want to guess which branch of the `if` statement ran; I want to be there when it happens.
async function fetchUserData(userId) {
  try {
    const response = await fetch(`https://api.example.com/users/${userId}`);
    const data = await response.json();

    if (!data.isActive) {
      // Why are we hitting this?
      // I'll pause here to inspect 'data' and the call stack.
      debugger;
      throw new Error('User is inactive');
    }

    return data;
  } catch (error) {
    console.error('Fetch failed', error);
  }
}
When the code hits `debugger`, I have access to the entire current scope. I can hover over variables, type expressions in the console to test hypotheses, and step through the next lines one by one. This is infinitely more powerful than a static log message.
Debugging Asynchronous Nightmares
Async code is where most JavaScript developers hit a wall. The timing is unpredictable, and stack traces can be confusing. I treat async debugging differently than synchronous logic.
One specific issue I encounter often is the “race condition” or the “stale closure” in UI frameworks. I might fire off three network requests, but I only care about the last one. If I just log the output, I might see three results mixed up and not know which one actually updated my state.
When debugging network requests, I lean heavily on the Network tab in Chrome DevTools, but I also use a specific pattern in my code to track request timing.
async function searchWithDebug(query) {
  // Label the timing for this specific search
  const label = `Search: ${query}`;
  console.time(label);

  try {
    const results = await performSearchApi(query);
    console.log(`Results for ${query}:`, results.length);
  } catch (e) {
    console.error(e);
  } finally {
    // Tells me exactly how long this specific call took
    console.timeEnd(label);
  }
}
Using `console.time()` and `console.timeEnd()` helps me identify if a specific API call is dragging down performance or if the latency is causing the UI glitch.
Also, when I am dealing with complex Promise chains, I often insert a “tap” function to inspect the data flowing through without breaking the chain. This is a technique I picked up from functional programming, but it works great for quick debugging.
const debugTap = (tag) => (data) => {
  console.log(tag, data);
  return data; // Pass it through unchanged
};

fetch('/api/data')
  .then(res => res.json())
  .then(debugTap('Raw Data')) // Inspect here
  .then(processData)
  .then(debugTap('Processed')) // Inspect here
  .catch(console.error);
DOM Breakpoints: The “Who Changed That?” Tool
I cannot tell you how many times I have stared at a DOM element that was flickering, disappearing, or changing classes seemingly by magic. Trying to find the line of JavaScript responsible for removing a class in a massive codebase is like finding a needle in a haystack.
I don’t search the code anymore. I use DOM Breakpoints.
If you right-click an element in the Elements panel of your browser’s dev tools, you can select “Break on… > Attribute modifications”.
The next time *any* JavaScript code touches that class or style attribute, the browser pauses execution and takes me exactly to the line of code responsible. It doesn’t matter if it’s in a third-party library, a framework chunk, or my own code. It catches the culprit red-handed.
I recently used this to fix a bug where a modal was closing immediately after opening. I set a “Subtree modifications” breakpoint on the modal container. As soon as I clicked open, the debugger paused on a click-outside listener I had completely forgotten about. It saved me hours of grepping through event handlers.
Handling Errors and Stack Traces
We often ignore the stack trace until the app crashes, but I find that generating my own traces can be a powerful debugging technique. Sometimes I know *that* a function is being called, but I have no idea *who* is calling it.
If I have a utility function that is being misused, I can force it to tell me where the call came from using `console.trace()`.
function deprecatedFunction() {
  console.warn('This function is deprecated!');
  console.trace('Who called me?');
  // functionality...
}
This prints a full stack trace to the console without throwing an error or stopping execution. I can see the entire path of execution that led to this function call. It is invaluable when refactoring legacy code or debugging large systems where the flow of control isn’t obvious.
Conditional Breakpoints for Loop Debugging
Here is a scenario I face often: I have a loop processing 500 items. Item #437 causes a crash.
If I put a standard breakpoint or a `debugger` statement inside the loop, I have to click “Resume” 436 times to get to the interesting part. I refuse to do that.
Instead, I use Conditional Breakpoints. In DevTools, I right-click the line number and select “Add conditional breakpoint”. I can then write an expression like:
`items[i].id === ‘bad_id_437’`
The browser will run at full speed for the first 436 items and only pause when that condition is true. This keeps my workflow fluid. I get straight to the problem state without the manual repetition.
Network Debugging Beyond the Response Body
When I debug API interactions, looking at the JSON body is only half the story. I’ve been burned too many times by headers and status codes.
I had a bug recently where a user couldn’t save their profile. The API returned a generic error message. The JSON body was useless. I looked at the Network tab headers and realized the `Content-Type` was being sent as `text/plain` instead of `application/json` because of a misconfigured fetch wrapper.
Always check the request headers. If you are sending data, ensure your `Authorization` tokens are actually attached.
Here is a wrapper I use to debug fetch requests when I suspect header issues. It logs the full configuration before sending.
async function debugFetch(url, options = {}) {
  console.groupCollapsed(`🚀 Fetch: ${url}`);
  console.log('Method:', options.method || 'GET');
  console.log('Headers:', options.headers);
  console.log('Body:', options.body);
  console.groupEnd();

  const response = await fetch(url, options);

  if (!response.ok) {
    console.error(`❌ Error ${response.status}: ${response.statusText}`);
  }

  return response;
}
Conclusion
Debugging is not just about fixing errors; it is about understanding how your code actually executes versus how you think it executes. The gap between those two things is where bugs live.
I encourage you to pick one of these tools—maybe `console.table()` or conditional breakpoints—and force yourself to use it today. It might feel slower for the first five minutes, but once it becomes muscle memory, you will wonder how you ever managed without it.
The goal isn’t to write perfect code on the first try; that’s impossible. The goal is to make the process of correcting it less painful and more systematic. Stop guessing, stop drowning in logs, and start inspecting your application with precision.