Combining these two, we can work with Pandas using VS Code for editing and running your Python scripts. To install the library in VS Code, follow this sequence:
– Install Python extension for Visual Studio
– Open a new terminal
– Run the command:
pip install pandas
This process is summarized below in an HTML table format.
| Step | Action |
|---|---|
| First | Install Python extension for Visual Studio |
| Next | Open a new terminal in Visual Studio Code |
| Then | Run the command:
pip install pandas |
So, essentially, it’s about harnessing the power of the Python programming language via VS Code with the integration of Pandas providing added data handling capabilities. Combining these tools makes complex tasks like raw data processing or statistical computing more manageable due to the increased functionality. Once installed, you’ll be able to import pandas in your Python scripts using
import pandas as pd
, opening up a plethora of possibilities for data analysis directly within Visual Studio Code.
Installing Pandas into Visual Studio Code focuses on setting up the powerful data manipulation module within an integrated development environment. If you are working with tabular data, pandas can be a powerful tool that will save you time and effort.
First things first, pandas is a Python library intended to add robust data analysis capabilities to your coding projects. It’s perfectly suited for structured information like CSV files, Excel worksheets, SQL databases, or even JSON web responses from APIs. Its power lies in its simplicity: Pandas makes it incredibly easy to load, process, and analyze such data via a high-level interface.
The anchor of the library is the DataFrame, a two-dimensional table structure where each column contains a specific attribute, and each row stands for a particular observation, often serialized for efficiency.
Before we begin with the installation, let’s ensure that we have Python installed.
python --version
If Python is correctly installed, this command should print a version number. If not, head over to the Python downloads page and download the appropriate installer for your operating system.
Secondly, the Python package installer pip needs to be available on your computer. Verify if pip is installed by executing:
pip --version
If pip is missing, please follow the official installation instructions.
Once Python and pip are set up, installing pandas should be as simple as running:
pip install pandas
If everything went well, python should now recognize pandas as a local module:
python -c "import pandas; print(pandas.__version__)"
This command should print pandas’s version number, signaling the successful installation.
About using Pandas in Visual Studio Code:
When opening Visual Studio Code (VSCode), navigate to your project folder and create a new Python file. As soon as you try to import the pandas module with
import pandas as pd
VSCode might underline the ‘pandas’ part. This means the linter doesn’t recognize the module yet. There’s a chance that you’re having multiple Python versions installed and VSCode isn’t using the one Pandas got installed into.
To solve this issue, open the Command Palette (Ctrl+Shift+P) in VSCode, search for ‘Python: Select Interpreter’ and select the correct Python interpreter. After doing this, VSCode should successfully verify the Pandas installation. To confirm, try executing your program with a simple DataFrame creation:
import pandas as pd

data = {
    'apples': [3, 2, 0, 1],
    'oranges': [0, 3, 7, 2]
}

purchases = pd.DataFrame(data)

print(purchases)
Visual Studio Code offers great support for Python and libraries like Pandas, so you’ll get helpful features like autocompletion, linting, and debugging right out of the box!
Remember to use the official Pandas documentation as a reference when you encounter issues or need more extensive examples related to data manipulation tasks. Happy data wrangling!The first step you’ll need to take is to install Python on your system. Luckily, that’s a relatively simple process.
Firstly, please navigate to Python’s official webpage and download the current version of Python suitable for your operating system (Windows/Linux/Mac).
Make sure to check the box during the installation process that says “Add Python to PATH”, as this step will save you some heartache later. Click through the rest of the options and wait for the installer to finish its work. You can verify if Python installed correctly by opening a new command prompt window and typing `python –version`. You should see Python’s version number.
The relevant Python code sample:
python --version
Then, you’ll also need to install Visual Studio Code (VS Code), which is an excellent Python editor. You can download VS Code from Microsoft’s official website. Run the setup file and follow the instructions just like any other software installation. After it’s installed and launched, check out the Extensions sidebar where you’ll need to download the Python extension for VS Code.
To install the Python extension, perform a search in the Extensions sidebar for ‘Python’. Click on the result named just “Python” (published by Microsoft) and then click on the Install button.
Next, you want to setup pandas into Visual Studios Code. For those not familiar with pandas – it is a popular data manipulation library used in data analysis and machine learning tasks built on top of two core Python modules – Matplotlib for data visualization, and NumPy for mathematical operations.
Here’s how you do it:
Firstly, open the terminal inside Visual Studio by going to “terminal” in the header and selecting “`new terminal`”. A terminal will open at the bottom section of the screen.
Then, in order to use pandas you must install it. You can execute the following command:
The relevant Python code sample:
pip install pandas
If you installed Python from the official website and performed the steps mentioned above when installing, you would have pip (which is a package installer) already set up for use in terminal. This command tells pip to download and install the pandas package from the Python Package Index (PyPI).
Now, for authentication just ensure that ‘pandas’ was installed correctly by importing it. In the root of your project folder create a new python file, type:
The relevant Python code sample:
import pandas as pd
Your Python environment in Visual Studio Code should be set up now! Remember, installing packages like pandas only extends the capabilities of Python, making Visual Studio Code a powerful tool for various applications from web development to data science.The process of setting up your environment in Visual Studio Code (VSC) for pandas installation involves several steps. Here is a step-by-step guide on how to do just that:
Step 1: Install Python
Before you can install pandas, you need to have Python installed in your system. You can verify if Python is already installed by opening your terminal and typing
python --version
. If not yet installed, you can download it from the official Python website – here.
Step 2: Install Visual Studio Code
Visual Studio Code provides an integrated development environment (IDE) for Python, making it easier to write, debug, and run Python code. You can download VSC from the official Microsoft website – here.
Step 3: Install the Python Extension in Visual Studio Code
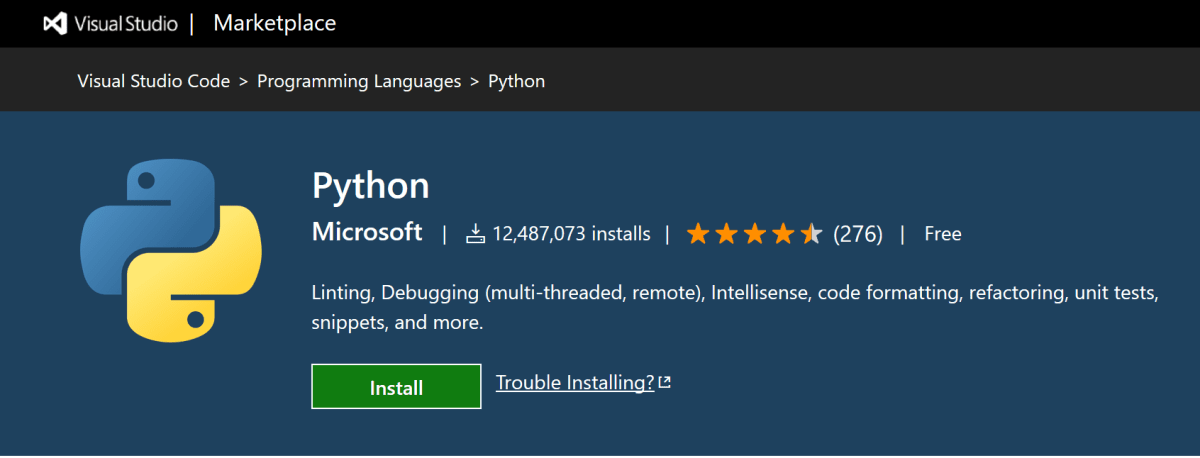
After installing VSC, you also need to install the Python extension in VSC. In the VSC platform, click on the ‘Extensions’ menu or press
Crtl+Shift+X
and then search for ‘Python’. Click on the ‘Install’ button.
| Screenshot |
|---|
 |
Source: Microsoft’s Python Tutorial
Step 4: Setup Python Interpreter
Next, set the Python interpreter in VSC. Press
Crtl+Shift+P
, type ‘Python: Select Interpreter’, and select the installed python.
Step 5: Create a Virtual Environment
Creating a virtual environment isolates the environment for each Python project, ensuring that each project has its own set of dependencies that won’t disrupt any other project. You can create a virtual environment using this command in the Terminal window:
python -m venv .venv
Next, you can activate the virtual environment:
– MacOS/Linux:
source .venv/bin/activate
– Windows:
\.venv\Scripts\activate
Step 6: Install Pandas into Visual Studio Code
Finally, time to install pandas! To install the pandas package, you can use pip, which is Python’s package manager. In the Terminal pane in VSC, use the following command:
pip install pandas
And voila! You’ve successfully installed pandas in your Visual Studio Code environment. Now you can import pandas in any Python script by adding
import pandas as pd
at the top of your code.
Good luck with your Python programming and data analysis projects using pandas!
Do note that these are the main steps for setting up your environment in Visual Studio Code for pandas installation, different systems may require additional configuration or setup. Be sure to consult the documentation and help resources available online for additional information.The first step to install pandas into Visual Studio Code would be to launch the integrated terminal. The Integrated Terminal is an in-built feature of Visual Studio Code that supports Powershell, Command Prompt, Git Bash, and other shells.
To open the integrated terminal:
1. You can either use the shortcut `Ctrl + ~`.
2. Or select `View -> Terminal` from the menu bar at the top of Visual Studio Code.
A new terminal session should now appear at the bottom of your screen (inside Visual Studio Code).
Installation Using pip
To install Python’s pandas library via Visual Studio Code’s integrated terminal, you should pip. Pip is a package installer for Python. It comes pre-installed with the new versions of Python (Python 2 >=2.7.9 or Python 3 >=3.4).
Here is the code snippet for installing pandas using pip:
pip install pandas
Installation Using Conda
If you have Anaconda distribution installed, you can also use conda to install pandas. Below is the command that needs to be executed in the terminal.
conda install pandas
You should be able to successfully install pandas by now.
Verifying Your Installation
After completion of above steps, one very important step remains: verifying whether pandas has been properly installed. Write the following commands in your integrated terminal and run it.
python
import pandas as pd
print(pd.__version__)
This will print the version of pandas installed on your system. If you see a version number printed, it confirms that pandas is installed correctly on your system and is ready for use within your Python codes inside Visual Studio Code.
Resolving Issues
If during installation, you encounter an error like “pip is not recognized”, you may need to set the Path variable of your system environment variables. Feel free to refer here for any kind of assistance related to setting Python Path if needed.
Remember that Visual Studio Code and its integrated terminal adopt a straightforward approach towards package installation. They give developers flexibility to control their development process and enable them to enhance project productivity levels.
Take advantage of these features and continue harnessing the power of pandas and other Python packages to create meaningful, insightful solutions in your next coding endeavor.
The process of installing any library in Visual Studio Code (VSC) is generally the same. However, there are specific steps that you must adhere to for a smooth installation of the Pandas Library in VSC and ensure its full use for upcoming data manipulation tasks.
Step One: Verify Your Python Installation
Before getting started with the installation of Pandas, make sure that you have Python installed on your system. To verify this, you can copy and paste the following command into the terminal:
python --version
If Python is installed, the version must be displayed. Make sure you’re using Python version 3 or newer since older versions may not work correctly.
Step Two: Installing Pip
Once confirmed that Python is installed, check if pip (package installer for Python) is available. If it’s not already installed, it will come handy for installing Pandas. Run the command below to check if it’s installed:
pip --version
If Pip isn’t installed, follow the official guidance on how to install pip.
Step Three: Installation of Pandas Library using Pip
Now that both Python and pip are installed, you’re ready to install the Pandas library. Use the pip command in Visual Studio Code’s Terminal to install it:
pip install pandas
This instructs pip to download and install the latest version of Pandas from the Python Package Index.
Step Four: Confirming the Installation of Pandas
After the installation process, confirm whether Pandas has been successfully installed. Initiate Python in Visual Studio Code’s terminal:
python
Then import the Pandas library
import pandas as pd
This command assigns the keyword “pd” to the pandas library. The absence of an error upon execution is an indicator that Pandas has been installed successfully.
Importing CSV files using the Installed Pandas Library
To further illustrate the utility of the newly installed Pandas library, here is an example of how to import CSV files:
import pandas as pd
data = pd.read_csv('filename.csv')
print(data)
Replace ‘filename.csv’ with the name of the actual file you intend to read.
There you go! By following these clear and simple steps, I have guided you through the whole process of installing and setting up Pandas on Visual Studio Code. Now, you have one of the most robust libraries at your disposal ready for your complex data analysis tasks.
The road to downloading Pandas in Visual Studio Code may sometimes be bumpy. It’s not always a straightforward task, and you could potentially encounter several common issues along the way. In this post, I’ll discuss how you can troubleshoot and resolve such problematic occurrences.
ISSUE: pip is not recognized as an internal or external command
Many people typically confront this by either receiving an error alert stating ‘pip’ isn’t acknowledged as an internal or external command or that ‘pip’ could not locate in the system PATH. Python appears with pip pre-installed from versions 3.4+. Hence, if you’re getting this error, there’s a possibility it’s an outcome of an issue with your PATH.
Resolve this by verifying your Python and pip installations and ensuring they are included in your system’s PATH. Here’s how:
import sys
print(sys.executable)
This code outputs where Python is installed on your PC. Add that Python location to your PATH in your environment variables.
ISSUE: ImportError: No module named pandas
If you’ve effectively managed to install pandas, but you’re still encountering an import error when trying to use it, it’s plausible that you are not using the Python interpreter in the same location as your pandas installation.
To help solve this problem, specify the correct Python interpreter location in Visual Studio Code settings.json file:
"python.pythonPath": "/usr/local/bin/python3"
Be sure to replace /usr/local/bin/python3 with your Python installation path.
ISSUE: pandas requires Microsoft Visual C++ 14.0
Occasionally, during the installation of some packages via pip (like Pandas), you might see an error noting – “Microsoft Visual C++ 14.0 is required”. This means that your system necessitates MSVC 14.0 for the installation of the desired package.
To fix, download the Microsoft C++ Build Tools and make sure to tick the “C++ build tools” checkbox and the Windows 10 SDK checkbox while installing it. The page (source) will guide you through identifying the appropriate version based on your system requirements.
Finally, don’t forget that the best way to avoid any issues with dependencies (like missing out on some key utilities while handling vast libraries like pandas) is to utilize virtual environments like venv. By creating isolated environments for each project, you ensure that all necessary resources are focused where they need to be and hence, decreasing the chances of clashes and errors.
Remember, troubleshooting is an art that requires patience. Keep calm and keep tweaking!
After successfully installing Pandas in Visual Studio Code, the real fun begins. It is an incredibly powerful library for data analysis and manipulation in Python. Here are a few post-installation tips to unlock its full potential.
One tool you’re going to want to use immediately is Pandas’ DataFrame. A DataFrame is a two-dimensional data structure. It is essentially a table with rows and columns where data can be stored and manipulated. You can think of it as a dictionary of Series structures where both Series and DataFrames come equipped with a host of useful functions to help with data analysis. Importing your data into Pandas is the first step towards analysing it. Here’s how you might import your data from a CSV file:
import pandas as pd
mydata = pd.read_csv('mydata.csv')
Now that we have our data loaded into a DataFrame, we can leverage the power of Pandas even further through its built-in functions such as:
– Filtering data: This involves selecting certain rows from your DataFrame based on given conditions. It allows you to work with subsets of your data. For instance, you may need to filter data to find high-scoring students. If ‘scores’ were a column of our DataFrame we could do this like so:
high_scores = mydata[mydata['scores'] > 60]
– Manipulating data: Pandas provides easy ways to add, modify or delete parts of your data. For example, if you wished to drop a column from your data, you could do this as follows:
mydata.drop('scores', axis=1)
To break all these operations down, I urge you to check out the official [Pandas Cheat Sheet].
In order to make sure that Pandas is perfectly integrated with your environment, try to run some tests that call various features of Pandas and see if they’re working as expected. One way to go about this is to create a new .py document, then import pandas as follows :
import pandas as pd
Just execute your code, and if nothing happens (i.e., no errors are thrown), then congratulations! Pandas has been installed properly and is now ready for use.
Pandas, ultimately, provides extensive capabilities for data manipulation which will significantly ramp up your data analysis game. The more you practice using these functionalities, the better you’ll get in streamlining your data processes. Happy coding!
Completing the process of installing pandas into Visual Studio Code (VS Code) further expands your Python programming environment. For data analysis and manipulation projects, Pandas serves as a robust, flexible open-source library. Following installation steps discussed earlier, first, you’ll need to ensure that Python is installed in your VS Code. The second step is to install the “Python extension for Visual Studio Code” from the marketplace.
Afterward, installation of pandas can be initiated using
pip
, the Python Package Index. Open Terminal in VS code and enter
pip install pandas
.
Here is a mockup of how this should look:
C:\Users\Your Name>pip install pandas
The command line will process, and just as it wraps up, success! Your VS Code now has pandas installed. Now you can unlock a plethora of functionalities that streamline your data manipulation and analytical applications on Visual Studio Code.
Now, it’s important to keep in mind that the pip version should always be kept up-to-date so that the pandas package will function optimally. To upgrade your pip version on command line enter,
pip install --upgrade pip
.
Also noteworthy, when using specific versions of pandas or to isolate your project’s environment, you can make use of Python’s virtual environments. This way conflicts between different versions are avoided.
Remember: Achieving successful coding practices extends beyond simply installing necessary packages like pandas. Rather, it’s about mastering utilization techniques for these tools in achieving unique programmatic creations. Always consult Pandas Documentation to explore the extensive capabilities & possibilities of this powerful library.
The limitless capability of Python programming is seen in libraries like pandas, bringing efficiency, flexibility, and robust functionality to Visual Studio Code for users. By taking advantage of the integration provided between pandas and VS Code, users can create more streamlined workflows, efficient codes, and comprehensive data analysis projects. So, get started with experiencing the new frontier of coding abilities that await you with the incorporation of pandas.
If you face any obstacles during the aforementioned setup phases, consider referring to reliable online resources, including Python and Visual Studio’s official documentation or community forums. These channels often provide ample guidance, with practical solutions contributable by expert developers worldwide. You see, the coding community is keener on delivering solutions rather than dwelling on challenges. This collaborative spirit helps overcome even seemingly insurmountable coding glitches. This is a demonstration of coders’ commitment to ensuring compatibility and functionality across all extensions, packages, and libraries- pandas included!
That being said, if you’re ever faced with an obstacle during your pandas setup on VS Code, remember: the solution is just a click away! I hope this guide has brought clarity to your query. Happy coding!
I took reference from the following links:
– Visual Studio Code Docs: Python Environments
– Official Pandas Website


