
For developers, debugging is as fundamental as writing code itself. We’ve all been there: chasing a mysterious bug, littering our codebase with console.log('here') or print(variable) to trace the execution flow. While these simple statements are the go-to for a quick fix, they quickly become a liability in complex, large-scale applications. They create noise, lack context, are difficult to manage, and can even introduce performance bottlenecks if left in production code.
This is where debug libraries come in. These specialized tools provide a structured, configurable, and performant way to handle logging and debugging. They transform debugging from a chaotic process of adding and removing print statements into a systematic and insightful practice. By offering features like namespacing, conditional output, severity levels, and color-coding, debug libraries empower developers to gain deeper visibility into their applications without sacrificing code cleanliness or performance. This article provides a comprehensive guide to understanding, implementing, and mastering debug libraries, exploring practical examples in both JavaScript/Node.js and Python, and covering the best practices essential for modern Software Debugging.
The Foundation of Modern Debugging: Why Use a Library?
The transition from basic print statements to a dedicated debug library is a critical step in a developer’s journey toward writing more maintainable and robust code. Understanding the limitations of the former highlights the immense value of the latter.
The Inherent Limitations of console.log
In the world of JavaScript Debugging, console.log is often the first tool developers reach for. It’s built-in, simple, and effective for isolated problems. However, its shortcomings become glaringly obvious as a project scales:
- Lack of Control: All
console.logstatements are active by default. To turn them off, you must manually comment out or delete them, which is tedious and error-prone. There’s no easy way to enable logging for just one specific module while keeping others silent. - Noise and Obscurity: In a large application, a flurry of undifferentiated log messages can flood the Debug Console, making it nearly impossible to find the specific information you need.
- No Context: A simple string or variable logged to the console lacks crucial context like its origin module, a timestamp, or a severity level. Is this an informational message or a critical warning?
- Performance Impact: While a single log statement is trivial, hundreds or thousands of them, especially those logging large objects in a tight loop, can negatively impact application performance, particularly in a production environment.
Introducing Debug Libraries: Structure and Control
Debug Libraries solve these problems by introducing a layer of abstraction and configuration over the logging process. Their core principle is conditional output, typically controlled by environment variables. This means you can leave your debug statements in the code, and they will remain dormant and performance-neutral until explicitly activated.
Consider the popular debug library in the Node.js ecosystem. Instead of a generic log, you create a namespaced logging function. This immediately adds context and allows for granular control.
// Before: Using console.log
function processUserData(user) {
  console.log('Starting user data processing...');
  // ... logic ...
  console.log('User data processed:', user);
}

function connectToDatabase() {
  console.log('Attempting to connect to the database...');
  // ... logic ...
  console.log('Database connection successful.');
}

// After: Using the 'debug' library
const debugUser = require('debug')('app:user');
const debugDB = require('debug')('app:db');

function processUserData(user) {
  debugUser('Starting user data processing...');
  // ... logic ...
  debugUser('User data processed: %o', user); // %o formats the object
}

function connectToDatabase() {
  debugDB('Attempting to connect to the database...');
  // ... logic ...
  debugDB('Database connection successful.');
}
With this setup, running the application normally produces no output. But by setting an environment variable, you can enable specific logs: DEBUG=app:user will only show user-related messages, while DEBUG=app:* will show everything under the app namespace. This simple change revolutionizes the Code Debugging workflow.
Practical Implementation: A Deep Dive into the `debug` Library
Let’s explore a more practical, real-world application of the debug library within a Node.js Express application. This will demonstrate how namespacing can bring clarity to the complex interactions within a typical web server, a common scenario for Backend Debugging.
Getting Started and Basic Usage
First, add the library to your project:
npm install debug
Next, create namespaced debug instances in different parts of your application. A common convention is to use a prefix for your application followed by the module or component name (e.g., myapp:server, myapp:database, myapp:routes:auth).
Enabling and Filtering Debug Messages in an Express App
Imagine an Express application with separate modules for server setup, database connection, and API routing. By using distinct debug namespaces, we can selectively inspect the behavior of each part.
// file: server.js
const express = require('express');
const app = express();
const connectDB = require('./db');
const authRoutes = require('./routes/auth');
const debug = require('debug')('myapp:server');

const PORT = process.env.PORT || 3000;

// Connect to Database
connectDB();

app.use('/api/auth', authRoutes);

app.get('/', (req, res) => {
  debug('Received request for root path /');
  res.send('API is running...');
});

app.listen(PORT, () => debug(`Server listening on port ${PORT}`));

// file: db.js
const debugDB = require('debug')('myapp:database');

const connectDB = async () => {
  try {
    // Mock database connection
    setTimeout(() => {
        debugDB('MongoDB connected successfully...');
    }, 1000);
  } catch (err) {
    console.error(err.message);
    process.exit(1);
  }
};

module.exports = connectDB;

// file: routes/auth.js
const express = require('express');
const router = express.Router();
const debugAuth = require('debug')('myapp:routes:auth');

router.post('/login', (req, res) => {
  debugAuth('Login attempt for user: %s', req.body.username || 'unknown');
  // ... authentication logic ...
  debugAuth('Login successful');
  res.status(200).json({ token: 'fake-jwt-token' });
});

module.exports = router;
With this code, you can now run your server with fine-grained debug output control:
- See everything:
DEBUG=myapp:* node server.js - Only database and server logs:
DEBUG=myapp:database,myapp:server node server.js - See all route logs but exclude auth:
DEBUG=myapp:routes:*,-myapp:routes:auth node server.js
This level of control is invaluable for API Debugging and isolating issues within microservices or complex monolithic applications. It allows developers to focus on the problem area without being distracted by irrelevant logs from other system components.
Expanding Your Toolkit: Python Debugging and Advanced Techniques
The principles of structured logging are not unique to JavaScript. Most modern programming languages offer robust tools for this purpose. In Python, the built-in logging module provides a powerful and highly configurable framework for effective Python Debugging.
Structured Logging in Python with `logging`
Python’s logging module is more feature-rich than the simple `debug` library, offering severity levels (DEBUG, INFO, WARNING, ERROR, CRITICAL), handlers (to direct output to files, the console, or network sockets), and customizable formatters.
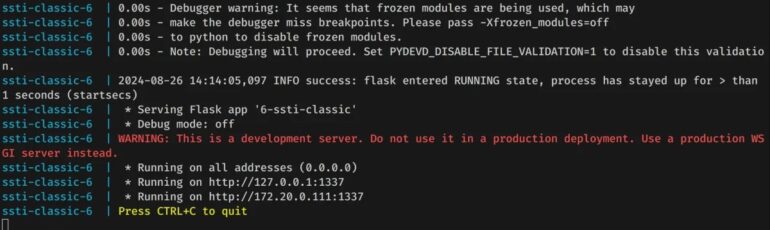
Here’s how you can set up a sophisticated logging configuration for a Flask Debugging or Django Debugging scenario:

import logging
import sys

# 1. Create a logger instance
# It's best practice to use the module's name
logger = logging.getLogger(__name__)
logger.setLevel(logging.DEBUG) # Set the lowest level to capture all messages

# 2. Create handlers
# A handler for writing to the console (stdout)
stream_handler = logging.StreamHandler(sys.stdout)
stream_handler.setLevel(logging.INFO) # Only show INFO and higher on console

# A handler for writing to a file
file_handler = logging.FileHandler('app.log')
file_handler.setLevel(logging.DEBUG) # Log everything to the file

# 3. Create a formatter and add it to the handlers
formatter = logging.Formatter(
    '%(asctime)s - %(name)s - %(levelname)s - %(message)s'
)
stream_handler.setFormatter(formatter)
file_handler.setFormatter(formatter)

# 4. Add the handlers to the logger
logger.addHandler(stream_handler)
logger.addHandler(file_handler)

def perform_critical_task(data):
    """Example function that uses the configured logger."""
    logger.debug(f"Starting task with data: {data}")

    if not data:
        logger.warning("Input data is empty. Proceeding with caution.")

    try:
        # Simulate a complex operation
        result = 10 / len(data)
        logger.info(f"Task completed successfully with result: {result}")
        return result
    except ZeroDivisionError:
        logger.error("Critical error: Division by zero.", exc_info=True)
        # exc_info=True automatically adds stack trace information

# Example usage
perform_critical_task([1, 2])
perform_critical_task([])
This setup provides a dual-output system: a clean, high-level overview in the console for general monitoring, and a verbose, detailed log file for deep-dive Error Tracking and post-mortem analysis. The inclusion of `exc_info=True` automatically captures Stack Traces for exceptions, which is essential for efficient bug fixing.
Advanced Debugging Techniques
Beyond basic namespacing and levels, modern Debugging Techniques include:
- Browser Debugging: The JavaScript
debuglibrary is isomorphic; it also works in the browser. It useslocalStorageto persist theDEBUGsettings, allowing you to enable logs for specific frontend components (e.g., in React Debugging or Vue Debugging) and have them remain active across page reloads. - Performance-First Design: A key feature of these libraries is that when a namespace is disabled, the call to the debug function becomes a no-op (a function that does nothing). The arguments aren’t even evaluated. This ensures that there is virtually zero performance overhead in production for disabled debug statements.
- Integration with Monitoring Tools: Structured logs are machine-readable. By outputting logs in a format like JSON, you can easily pipe them into Error Monitoring and observability platforms like Sentry, Datadog, or an ELK stack (Elasticsearch, Logstash, Kibana) for powerful Production Debugging and analysis.
Best Practices for Secure and Efficient Debugging
Using a debug library is a significant improvement, but it’s not a silver bullet. Adhering to best practices is crucial for maintaining a secure, performant, and maintainable codebase.
Security: Mind What You Log
This is the golden rule of logging. Never, under any circumstances, log sensitive information. This includes passwords, API keys, session tokens, personally identifiable information (PII), or financial data. Verbose debug logs can be an attack vector if they are exposed in production environments. Always treat log output as a potential security risk and sanitize any user-generated content before logging.

Dependency Management and Supply Chain Security
Debug libraries, like any other dependency, are part of your application’s supply chain. It’s vital to manage these dependencies responsibly.
- Use Lockfiles: Always commit your lockfile (
package-lock.json,yarn.lock,poetry.lock) to your version control system. This ensures that every developer and CI/CD pipeline installs the exact same version of every dependency, preventing unexpected changes. - Audit Dependencies: Regularly run security audits on your project using tools like
npm audit, Snyk, or GitHub’s Dependabot. These tools scan your dependencies for known vulnerabilities and can help prevent malicious packages from compromising your application.
Maintainability and Consistency
To maximize the benefits of a debug library, your team needs to use it consistently.
- Establish a Naming Convention: Define a clear and predictable namespacing convention for your project (e.g.,
app-name:module:sub-component) and document it. - Control in CI/CD: Use your CI/CD pipeline to control debug environments. For instance, enable extensive debugging for testing environments but ensure the
DEBUGenvironment variable is unset or strictly limited in staging and production builds. - Code Reviews: During code reviews, check that new debug statements follow the established conventions and do not log sensitive data. This reinforces good habits and maintains the quality of your codebase.
Conclusion: Elevating Your Debugging Workflow
Moving beyond console.log to embrace dedicated Debug Libraries is a hallmark of a mature development process. Tools like JavaScript’s debug and Python’s logging module provide the control, context, and performance necessary to tackle the complexities of modern application development. They enable a more systematic approach to Bug Fixing, transforming the debug console from a chaotic stream of data into a powerful, filterable diagnostic tool.
By mastering these libraries and adhering to security and maintainability best practices, you can significantly enhance your debugging efficiency, improve collaboration within your team, and build more reliable and secure software. The next time you find yourself reaching for a quick print statement, take a moment to consider if a structured, namespaced debug message would serve you and your project better in the long run. Your future self will thank you.