
In modern software development, the phrase “it works on my machine” is both a running joke and a source of immense frustration. More often than not, the mysterious chasm between a developer’s local environment and a staging or production server is carved out by the network. Network issues are the invisible ghosts in the machine, causing everything from subtle latency to catastrophic connection failures. For developers building web applications, microservices, or any distributed system, mastering network debugging is not just a valuable skill—it’s an essential one.
Network debugging is a multi-layered discipline that requires a versatile toolkit and a systematic approach. It involves peeling back layers of abstraction, from inspecting high-level API JSON payloads down to analyzing the raw TCP/IP packets flowing between machines. Whether you’re dealing with a flaky API endpoint, a misbehaving container, or a complex consensus algorithm in a distributed database, understanding how to diagnose and resolve network problems is critical for building robust and reliable software. This guide will walk you through the core concepts, practical tools, and advanced techniques you need to confidently tackle any network-related bug.
Understanding the Layers of Network Communication
Effective network debugging begins with a foundational understanding of how network communication is structured. The OSI and TCP/IP models provide a conceptual framework that helps you isolate problems systematically. Instead of guessing, you can form hypotheses about which layer is failing, allowing for more targeted investigation.
The OSI Model in Practice
While a deep dive into all seven layers of the OSI model is academic, thinking in terms of three key layers is incredibly practical for everyday debugging:
- Network Layer (Layer 3): Is there a path between two machines? This is where tools like
pingandtracerouteshine. They help you answer basic questions about routing and reachability. If you can’t ping a server, no application-level code will ever work. - Transport Layer (Layer 4): Can a connection be established on a specific port? This is the domain of TCP and UDP. Errors like “Connection Refused” indicate that nothing is listening on the destination port, while “Connection Timed Out” suggests a firewall or network issue is preventing the connection from being established.
- Application Layer (Layer 7): Once a connection is made, does the application protocol (like HTTP) work correctly? This is where most developers spend their time, debugging API requests, data formats, and authentication.
Essential Tools for Packet-Level Analysis
When you need to go deeper than simple connectivity checks, you need to inspect the raw data packets. Tools like tcpdump and Wireshark are indispensable for this.
tcpdump is a powerful command-line packet analyzer. It allows you to capture and display network traffic in real-time, making it perfect for quick checks on a remote server. For example, to see if any traffic is arriving on port 8000, you can run a simple command.
# Listen for any TCP traffic on port 8000 on the eth0 interface
# -i: specify network interface
# tcp port 8000: filter for TCP traffic on this port
# -n: don't resolve hostnames (shows raw IPs)
# -A: print the payload of each packet in ASCII
sudo tcpdump -i eth0 tcp port 8000 -n -A
Wireshark provides a graphical user interface for the same data, offering powerful filtering and protocol analysis capabilities. It’s ideal for complex debugging scenarios where you need to reconstruct entire TCP streams or analyze TLS handshakes. By capturing traffic, you can definitively see what data is being sent and received, bypassing any abstraction or logging layers in your application.
From Packets to Payloads: Debugging at the Application Layer
While packet analysis is powerful, most network debugging happens at the application layer. This is where you diagnose issues with API calls, data serialization, and application logic. The right combination of logging and specialized tools can make this process significantly easier.
The Critical Role of Structured Logging
Good logging is your first and most important line of defense. When a network request fails, your logs should provide enough context to understand what happened without having to reproduce the issue. For network interactions, your logs should always include:
- A unique correlation ID to trace a single request across multiple services.
- The source and destination IP addresses and ports.
- The full request URL and HTTP method.
- Request and response status codes.
- Request and response headers (especially for debugging authentication and caching).
- The time taken for the request to complete (latency).
Using structured logging (e.g., JSON format) makes your logs machine-readable, allowing for easier searching, filtering, and analysis with tools like the ELK Stack or Datadog.
import logging
import json
from flask import Flask, request

# Example of structured logging in a Python Flask application
app = Flask(__name__)

# Configure a JSON formatter for the logger
class JsonFormatter(logging.Formatter):
    def format(self, record):
        log_record = {
            "timestamp": self.formatTime(record, self.datefmt),
            "level": record.levelname,
            "message": record.getMessage(),
            "request_id": request.headers.get("X-Request-ID", "N/A"),
            "remote_addr": request.remote_addr,
            "url": request.url
        }
        return json.dumps(log_record)

handler = logging.StreamHandler()
handler.setFormatter(JsonFormatter())
app.logger.addHandler(handler)
app.logger.setLevel(logging.INFO)
app.logger.propagate = False

@app.route('/api/data')
def get_data():
    app.logger.info("Processing request for /api/data")
    # ... application logic ...
    if some_error_condition:
        app.logger.error("Failed to retrieve data from upstream service.")
        return {"error": "Internal Server Error"}, 500

    return {"data": "some_payload"}, 200

if __name__ == '__main__':
    # Note: Don't use the development server in production
    app.run(debug=True)
Case Study: Resolving Mismatched Signatures
A common and frustrating bug in API development involves cryptographic signature verification. The client creates a signature, the server tries to verify it, and it fails with an “Invalid Signature” error. This almost always stems from a subtle difference in the data being signed on the client versus the server.
The Debugging Process:
- Log Everything: On both the client and the server, log the exact, byte-for-byte string that is being fed into the signing/verification algorithm. Do not log the data *before* serialization; log the final string.
- Compare the Strings: Use a diff tool to compare the logged strings from the client and server. The culprit is often a tiny discrepancy: extra whitespace, different key ordering in a JSON object, or a different character encoding.
- Unify the Logic: Encapsulate the signature generation logic into a shared function or library that both client and server can use, or ensure the implementation is meticulously identical.
Here’s a Python example illustrating a common pitfall where the order of dictionary keys affects the signature string.
import hashlib
import json

# The data to be signed
payload = {
    "user_id": 123,
    "nonce": "a1b2c3d4",
    "timestamp": 1677610000
}
secret_key = "my_super_secret_key"

# --- BUGGY APPROACH: Unordered Dictionary Serialization ---
# Python dictionaries before 3.7 did not preserve insertion order.
# Different systems might serialize this dictionary differently.
buggy_string_to_sign = json.dumps(payload) + secret_key
buggy_signature = hashlib.sha256(buggy_string_to_sign.encode()).hexdigest()
print(f"Buggy String: {buggy_string_to_sign}")
# On another system, json.dumps(payload) might be '{"nonce": "a1b2c3d4", "user_id": 123, ...}'

# --- CORRECT APPROACH: Canonical (Sorted) Serialization ---
# By sorting the keys, we guarantee the output string is always the same.
# The `separators` argument removes whitespace for a compact representation.
correct_string_to_sign = json.dumps(payload, sort_keys=True, separators=(',', ':')) + secret_key
correct_signature = hashlib.sha256(correct_string_to_sign.encode()).hexdigest()
print(f"Correct String: {correct_string_to_sign}")
print(f"Correct Signature: {correct_signature}")

# The server must use the exact same canonicalization method to verify the signature.
Tackling Complexity in Distributed and Containerized Systems
As applications evolve into microservices architectures running in containers, network debugging becomes exponentially more complex. A single user request might traverse dozens of services, and the network itself is a virtualized, dynamic environment managed by tools like Docker and Kubernetes.
Navigating the Docker Networking Maze
Containerization introduces new layers of network abstraction that can be a common source of bugs. A frequent issue, especially in peer-to-peer or service discovery systems, is a service incorrectly advertising its internal container IP address instead of its publicly accessible host IP.
For example, a node in a distributed network might listen on `0.0.0.0:8000` inside its container, which maps to port `8000` on the host. However, when it communicates with other peers, it might report its own IP as something from a private Docker bridge network (e.g., `172.17.0.2`). Other nodes cannot reach this address, causing them to be excluded from the network.

The solution is to make services aware of their external IP and to filter out private, internal IPs when sharing peer lists.
import ipaddress

def is_private_ip(ip_str: str) -> bool:
    """
    Checks if a given IP address string is in a private range (e.g., Docker, LAN).
    """
    try:
        ip_obj = ipaddress.ip_address(ip_str)
        return ip_obj.is_private or ip_obj.is_loopback
    except ValueError:
        # Invalid IP string
        return True

# A list of peers received from another node, potentially polluted
polluted_peer_list = [
    "164.68.108.218:8001", # A valid public IP
    "172.17.0.3:8002",     # A Docker internal IP
    "192.168.1.105:8003",   # A local network IP
    "127.0.0.1:8004",       # A loopback address
]

# Clean the list by filtering out private and invalid IPs
clean_peer_list = []
for peer in polluted_peer_list:
    try:
        host, port = peer.rsplit(':', 1)
        if not is_private_ip(host):
            clean_peer_list.append(peer)
    except ValueError:
        # Handle cases where the peer string is malformed
        print(f"Skipping malformed peer entry: {peer}")

print(f"Clean Peer List: {clean_peer_list}")
# Expected Output: Clean Peer List: ['164.68.108.218:8001']
Debugging Microservices with Distributed Tracing
In a microservices architecture, identifying the source of latency or errors is like finding a needle in a haystack. Distributed tracing solves this by propagating a unique trace ID across every service call involved in a request. Tools like Jaeger and Zipkin ingest this trace data and visualize the entire request lifecycle as a flame graph, showing how long each step took and which service failed.
Best Practices for Proactive Network Debugging
The most effective debugging is the kind you don’t have to do. By building observability and resilience into your systems from the start, you can prevent many network issues and make the remaining ones easier to diagnose.
Implement Comprehensive Health Checks
Every service should expose a `/health` or `/status` endpoint. A basic health check can simply return an HTTP 200 OK status. A more advanced check should verify its dependencies (e.g., database connections, connections to other services) and report a detailed status. This is essential for automated systems like Kubernetes and load balancers to know whether to route traffic to an instance.
Adopt Structured and Centralized Logging
As mentioned earlier, structured logs are key. Centralizing them in a platform like Elasticsearch, Splunk, or Loki allows you to search and correlate logs from all your services in one place. This is non-negotiable for debugging issues in a distributed system.
Automate Network Failure Testing
Your application should be resilient to transient network failures. How does it behave if a downstream service is slow or unavailable? Use tools like `toxiproxy` or `iptables` in your integration tests to simulate high latency, packet loss, and connection failures. This helps you verify that your timeouts, retries, and circuit breaker logic work as expected.
Prioritize Clear and Actionable Error Messages
Error messages are part of your application’s user interface for developers. A vague “Error 500” is useless. A good error message provides context and is actionable.
- Bad:
{"error": "An internal error occurred."} - Good:
{"error": "Failed to connect to authentication service at auth.service.internal: Connection timed out after 3000ms.", "request_id": "a1b2c3d4-e5f6-7890-abcd-ef1234567890"}
Conclusion
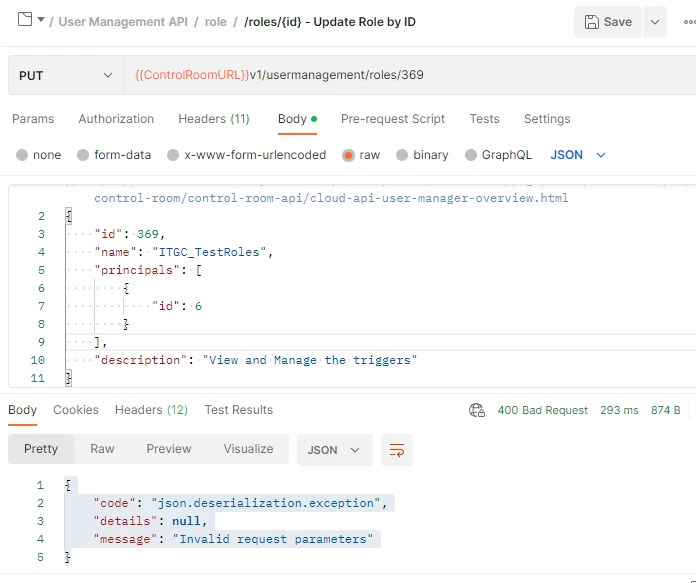
Network debugging is an expansive field, but it is not an unknowable art. By adopting a systematic, layered approach, you can move from confusion to clarity. Start with the basics of connectivity using tools like ping and tcpdump to verify the lower layers. At the application layer, lean heavily on structured, centralized logging and API debugging tools like Postman to analyze payloads and logic. In complex containerized and microservices environments, embrace distributed tracing and be mindful of virtualization pitfalls.
Ultimately, the best strategy is a proactive one. Build observability into your applications from day one with detailed logging, health checks, and actionable error messages. By treating your network interactions as a critical and observable part of your system, you can spend less time debugging and more time building resilient, reliable software.