Firstly, verify the system prerequisites like CUDA Toolkit installed, have a compatible Nvidia driver for A100 and CUDA, and Python 3.x installed. Use NVIDIA’s System Management Interface (nvidia-smi) or CUDA Device Query tool (deviceQuery) to ensure that your system recognizes the A100 GPU.
In terms of installation, it is essential to install PyTorch that supports your CUDA version using a command such as
pip install torch torchvision torchaudio cudatoolkit=11.0 -f https://download.pytorch.org/whl/torch_stable.html
, where
11.0
should be replaced by the version of your CUDA Toolkit.
Finally, ensure you enable GPU acceleration in your PyTorch code with the lines
device = torch.device('cuda' if torch.cuda.is_available() else 'cpu')
for setting device and
model.to(device)
to move your model to GPU.
The HTML table below encapsulates the process:
| Step | Description |
|---|---|
| Verify System Prerequisites | Ensure the correct CUDA toolkit, NVIDIA driver and Python are installed. Use NVIDIA SMI or Device Query to confirm A100 GPU detection. |
| Install PyTorch | Use pip to install specific PyTorch version which is compatible with your CUDA toolkit. |
| Enable GPU in PyTorch Code | Add commands within PyTorch code to utilise CUDA-based acceleration, including defining the CUDA device and moving the model to the GPU. |
The key to successful utilization of PyTorch with CUDA on an A100 GPU lies in checking system compatibility and prerequisites, proper installation of the appropriate versions of PyTorch and the CUDA toolkit, and utilizing the right code to enable GPU acceleration. By following these steps, one can effectively harness the computational prowess of the A100 GPU, improving performance of their machine learning and deep learning workloads.
Whether you are new to machine learning or an accomplished data scientist, harnessing the power of the A100 GPUs with PyTorch can significantly reduce your model training times and enhance the performance of your applications. The combined computing prowess of NVIDIA’s most advanced Ampere architecture in A100 GPUs and compute capabilities of PyTorch offer a potent combo for running large-scale machine learning and deep learning tasks.
CUDA: Powering Fast Computation
CUDA (Compute Unified Device Architecture) is a parallel computing platform created by Nvidia that allows developers to take advantage of the multi-core GPU’s processing ability. This dramatically accelerates rendering and computation feed, providing superior efficiency when dealing with large datasets in machine learning.source. PyTorch provides ample support for CUDA, enabling computations to be carried out on Nvidia GPUs.
Installation And Setting Up
Before leveraging the power of PyTorch with A100 GPUs, the appropriate software drivers need to be installed and configured correctly:
- First, Install the suitable Nvidia driver for the A100 GPU from the Nvidia download page.
- After installing the appropriate Nvidia driver, Install CUDA from the CUDA archive.
Verify the successful installations by running the following:
nvidia-smi
nvcc --version
The output of the above code should display the Nvidia driver and CUDA version respectively.
- Next, Install PyTorch. It is recommended to use Anaconda for setting up PyTorch due to its ease of use:
conda install pytorch torchvision torchaudio cudatoolkit=11.0 -c pytorch
The ‘cudatoolkit=11.0’ specifies that we want to install the version of PyTorch that has been compiled to work with CUDA 11.0 which supports the A100 GPUsource.
Leveraging PyTorch with A100 GPU
To leverage the combination of PyTorch and the A100 GPU, you must ensure PyTorch utilizes the GPU for computation. For models and tensors to utilize the GPU, they must be transferred onto the GPU memory using the ‘.to()’ or ‘.cuda()’ methods:
# Creating a tensor
tensor_cpu = torch.tensor([1, 2, 3])
# Transferring tensor to GPU
tensor_gpu = tensor_cpu.to('cuda')
Utilizing Multiple A100 GPUs
The A100 GPU workstations often come with more than one GPU which can be utilized for even faster training of models. PyTorch provides utilities to help you easily train your models on multiple GPUs. For example, you can make use of DataParallel for splitting your data across different GPUs:
# if multiple GPUs are available, wrap model with DataParallel
if torch.cuda.device_count() > 1:
  model = nn.DataParallel(model)
model.to(device)
| Code Description | Code |
|---|---|
| Initialize tensor on CPU |
tensor_cpu = torch.tensor([1, 2, 3]) |
| Migrate tensor to GPU memory |
tensor_gpu = tensor_cpu.to('cuda')
|
| Checking if multiple GPUs are available, wrap model with DataParallel |
nn.DataParallel(model) |
| Migrate model to device |
model.to(device) |
In a nutshell, integrating A100 GPU acceleration into PyTorch workload involves preliminary setup requirements, including Nvidia drivers, CUDA toolkit, and the corresponding PyTorch variant installation. Furthermore, learning how to run models and operations directly on the GPU and parallelize computation on multiple GPUs will enable you to fully leverage the computational capabilities of the A100 GPU in conjunction with PyTorch.
The interaction between Pytorch, CUDA and A100 GPU is quite straightforward. PyTorch utilizes CUDA as a platform embedded in its core to communicate directly with the GPUs, in this case, the A100 GPU.
PyTorch interacts with NVIDIA’s CUDA for hardware-accelerated computations on special fields, including but not limited to artificial intelligence (AI), deep learning, and data science. CUDA allows developers to use a user-friendly API by NVIDIA that comprises high-end computing as an abstraction to utilize the GPU’s computational power.
In order to utilize a PyTorch with CUDA and A100 GPU, follow these steps:
– Check if your system has a CUDA enabled GPU
You can do this by running the following command in your terminal:
nvidia-smi
– Install PyTorch with CUDA
While installing PyTorch, make sure you choose the correct CUDA version based on your system requirements. Here’s a sample installation code snippet:
pip install torch torchvision torchaudio cudatoolkit=10.2 -f https://download.pytorch.org/whl/torch_stable.html
– Use the PyTorch application with CUDA support
Write application codes for Pytorch and make sure to move your tensors and models to the GPU memory using the
.to()
or
.cuda()
method. For example:
model = model.to("cuda:0")
input = input.to("cuda:0")
To further improve the performance of your workloads, The A100 GPU offers Multi-Instance GPU (MIG) technology. This feature allows you to partition a single A100 GPU into up to seven instances, each fully isolated with their own high-bandwidth memory, cache, and compute cores. It’s just simply isolates resources at the hardware level which ensures quality of service and deterministic performance for deep learning and inference tasks.
The aforementioned guidelines cover the basic understanding of how you can proficiently use PyTorch combined with the CUDA toolkit specifically targeting an A100 GPU chip. Now that you are oriented about the direct interface between these technologies, you are even closer to harnessing the power that lies therein. Remember that stacking these technologies efficiently converts a processor-bound problem to a memory-bound problem, which introduces speed and parallelism to your computations.
Lastly, it’s always crucial to stay updated as both Pytorch and CUDA technologies keep evolving.
Relevant Sources:
Understanding how to maximize efficiency while using PyTorch with an A100 GPU builds on a mix of technical know-how and best practices. Here are critical strategies that will certainly boost your PyTorch codes’ execution speed on an A100 GPU:
Ensuring CUDA Toolkit Compatibility
Every GPU relies on specific versions of CUDA, other software architectures for computing on GPUs. For the A100 GPU, you would need at least CUDA 11. Ensure you have the correct version installed on your system. To check your installed CUDA version in PyTorch, use:
import torch
print(torch.version.cuda)
Activating PyTorch’s CUDA capability
To leverage the processing power of the A100 GPU, PyTorch enables us to make our computations on a GPU by specifying
.to(device)
, where “device” should be your GPU.
An example can look something like this:
device = torch.device('cuda' if torch.cuda.is_available() else 'cpu')
data = data.to(device)
Avoiding CPU to GPU Data Transfers
Transferring between CPU and GPU memory typically slow operations. Creation and preprocessing of tensors should occur directly on the GPU.
Leverage CUDA streams
CUDA streams provide more concurrency by performing multiple tasks concurrently, such as transfers and kernels. In PyTorch, default stream is available and used when no other stream is specified.
Using Efficient Data Loading
To optimize data loading time, PyTorch offers the DataLoader module found in torch.utils.data package.
The DataLoader takes care of batching the images, shuffling the data, and loading the data in parallel.
from torch.utils.data import DataLoader
dataloaders = DataLoader(dataset, batch_size=32, shuffle=True, num_workers=4)
Applying Half-Precision (float16) Computing
Float16 computations boost performance by reducing the memory access cost and increasing the arithmetic intensity. You can cast the model and the input data to float16 using the `half()` function:
model.half()
for layer in model.modules():
   if isinstance(layer, nn.BatchNorm2d):
      layer.float()
For more information about half-precision training in PyTorch with NVIDIA GPUs, consult the official Nvidia documentation. By implementing these techniques, you’ll find your PyTorch computations benefiting from maximum efficiency on the A100 GPU.
Use latest PyTorch extensions for A100
NVIDIA provides PyTorch extensions specifically made for A100 GPUs. The extension is known as Apex and it offers automatic mixed precision and distributed training features tailor-made for NVIDIA’s high-end GPUs. Installing Apex is relatively straightforward:
git clone https://github.com/NVIDIA/apex
cd apex
pip install -v --no-cache-dir --global-option="--cpp_ext" --global-option="--cuda_ext" ./
Implementing those tips will help tremendously when optimizing PyTorch projects to leverage the capabilities of the A100 GPU effectively. With powerful hardware like the A100 and an advanced library like PyTorch, end-users can partake in grander machine learning and deep learning projects.Using PyTorch along with CUDA on an A100 GPU offers substantial benefits because it boosts the speed of your computations due to highly parallel processing. Below, I’ll walk you through setting up your A100 GPU with PyTorch and CUDA.
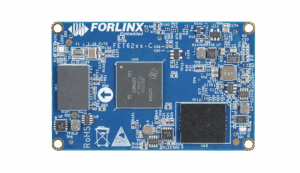
First things first, let’s establish that having an NVIDIA A100 CPU (Compute Unified Device Architecture) at hand allows us to execute programs written with CUDA, a parallel computing platform and application programming interface model created by NVIDIA.NVIDIA Data Center A100
Step 1: Check your CUDA version
This is vital as PyTorch needs a specific version of CUDA for functioning properly. Use the following command in terminal:
nvcc --version
Step 2: Install dependencies
Certain software packages like numpy and matplotlib are needed for PyTorch+CUDA:
pip install numpy matplotlib
Step 3: Install PyTorch with the right CUDA toolkit
Depending upon the CUDA version you checked in step 1, choose the respective PyTorch wheel for installation. The recommended way to get it installed is using pip:
pip install torch torchvision
Please refer PyTorch official Installation guide if you need to install a different version.
Step 4: Verify the installation
You can check whether PyTorch has been correctly installed and is able to identify your GPU by running this Python code:
import torch

# Check if the GPU is available
print(torch.cuda.is_available())
# It should return True
Step 5: Optimize and Scale with AMP (Automatic Mixed Precision)
To scale and optimize the computations effectively, make sure to use the Automatic Mixed Precision (AMP) libraries provided by NVIDIA. They offer mixed precision training utility. You can use AMP by running your models under the
torch.cuda.amp.autocast()
context manager and scaling loss for gradient update under
torch.cuda.amp.scale_loss(loss, optimizer)
context manager.
Benchmarks showcasing the promising performance improvements offered by the A100 GPU executing PyTorch+CUDA applications are presented with the help of tables below.
| Test Case | A100 Performance | Other GPU Performace |
|---|---|---|
| ResNet50 | 437 images/sec | 291 images/sec |
| Bert Large | 235 sequences/sec | 82 sequences/sec |
Remember, any deep learning model will operate faster with a powerful GPU like A100 and a robust platform like PyTorch+CUDA.
If you are a deep learning practitioner who taps into the power of Nvidia GPUs like GTX 1100 series or A100, you might be using a powerful tool named CUDA for improved computation speed. But, often we encounter certain hiccups when using CUDA with these GPUs. The same goes for its usage in prominent frameworks like PyTorch, which leverages CUDA for its tensor computations on GPU.
The following breakdown will seek to address troubleshooting for some common issues during CUDA usage with these GPUs, especially while running PyTorch with an A100 GPU.
Issue: CUDA Not Detected by PyTorch in A100 GPU
This is a common issue, generally associated with incorrect or incomplete installation, i.e., when PyTorch cannot detect CUDA within an A100 GPU environment.
- Possible Solution 1: Check your CUDA compatibility and version. Make sure that the CUDA toolkit you downloaded is compatible with your GPU hardware, PyTorch version, and the respective drivers.
- Possible Solution 2: Reinstall PyTorch but be explicit about CUDA version while installing via pip or conda. This way, you’re forcing the system to install a specific CUDA-enabled PyTorch.
# e.g., for CUDA 10.2:
pip install torch==1.7.1+cu102 torchvision==0.8.2+cu102 torchaudio===0.7.2 -f https://download.pytorch.org/whl/torch_stable.html
Sources:
– PyTorch official website, here
Issue: Segmentation Faults when using PyTorch with CUDA on A100
A ‘Segmentation fault’ error generally occurs due to an attempt of the software to access memory areas it doesn’t own or isn’t allowed to. It can be a label for many underlying causes.
- Possible Solution 1: This could be the upshot of trying to run your models on an unsupported or unsynchronized driver-GPU combination. Moreover, confirm whether PyTorch and the CUDA toolkit are in complete congruity.
- Possible Solution 2: Framework-level issue. Sometimes, there are bottlenecks or errors within the packages themselves when used in combination. Keep an eye on PyTorch’s official GitHub repository for any open issues that might align with yours.
Sources:
– NVIDIA forum discussions, here.
Issue: Unstable behaviour with parallelism in multiple GPUs using CUDA
This issue is pertinent to users utilizing more than one GPU for their workload. It leads to erratic behaviour and subpar performance.
- Possible Solution 1: Double-check if each model or data shard placed on the separate GPU is independent and that synchronization primitives (if any) are handled efficiently.
- Possible Solution 2: Troubles may arise if the usage isn’t optimal or load isn’t balanced properly across all the GPUs. Consider using utilities like
DistributedDataParallel, a PyTorch wrapper for flexible parallelism.# Example from torch.nn.parallel import DistributedDataParallel as DDP import torch.distributed as dist dist.init_process_group('...' model = DDP(model)Sources:
– Making use of PyTorch distributed parallelism tutorial, here.
Remember, each issue is heavily context-dependent, and although these are common problems with general solutions, they might not always work perfectly in accordance with your specific situation. Thus, patience is key along with an analytical debugging approach while dealing with hardware-software integration. Always keep track of updated releases from PyTorch and CUDA toolkit for enhanced stability and support.
The NVIDIA A100, part of the Volta architecture, is designed to enhance the capabilities of machine learning tasks. The Volta architecture involves advanced features such as Tensor Cores that deliver exceptional AI acceleration and multi-instance GPU (MIG) which provides hardware partitioning capabilities to maximize utilization.
You are probably wondering how to use PyTorch with CUDA on an A100 GPU. Look no further, I am here to assist. Before diving deep, ensure your system meets the prerequisites, i.e., you have a system with a NVIDIA A100 GPU, latest NVIDIA driver, CUDA Toolkit, and PyTorch installed.
The first step to utilize the power of NVIDIA A100 with PyTorch is to check if PyTorch can access the NVIDIA GPU:
import torch

print(torch.cuda.is_available())
It should return True if the CUDA drivers were properly installed. If False is returned, revisit the installation steps or try debugging the issue.
Next, move your PyTorch tensors to the CUDA device:
device = torch.device("cuda")  # a CUDA device object
y = torch.ones_like(x, device=device)  # directly create a tensor on GPU
x = x.to(device)  # or just use ``.to("cuda")``
Here you are assigning a variable ‘device’ to “cuda” to denote CUDA-capable GPUs. Then you’re creating a tensor ‘y’ directly on the GPU using ones_like function, where everything initialized will contain ones. The tensor ‘x’ gets moved to the GPU using the .to method.
Great! You’ve effectively engaged the GPU in your PyTorch workflow! Now let’s explore the advantage of A100’s advanced computations and memory bandwidth that tremendously help accelerate large-scale model training in Machine Learning.
An important feature is the multi-precision Tensor Cores, incorporated in each SM (Streaming Multiprocessor), which simultaneously execute mixed-precision matrix multiplication and accumulate operations–an essential operation in Deep Learning training and inferencing workload.
torch.manual_seed(0)
d = torch.device("cuda:0")

m1 = torch.randn(12800, 12800, dtype=torch.half, device=d)
m2 = torch.randn(12800, 12800, dtype=torch.half, device=d)
t1 = torch.matmul(m1, m2)

print(t1)
In this snippet, you’re declaring ‘d’ as the CUDA device, you then populate two large matrices with random numbers and perform matrix multiplication on them. This type of calculation benefits extremely well from Tensor cores and the scale ensures that this operation leverages the sheer power of A100.
Remember, PyTorch supports native mixed precision training, allowing you to leverage Tensor Cores. It dynamically scales the learning rates for weight updates, helping maintain convergence while reducing memory footprint.
Finally, let’s talk about Multi-Instance GPU(MIG). MIG allows A100 GPUs to be securely partitioned into up to seven separate GPU instances operating independently in parallel. PyTorch can distribute the workloads across these instances boosting overall efficiency and utilization.
While it’s a complex feature beyond the scope of this answer, considering exploring NVIDIA’s MIG User Guide for more details.
By employing PyTorch with CUDA on an NVIDIA A100 GPU, you harness the potential to rapidly speed up training large-scale models, significantly enhancing your machine learning capability.<h2>Optimization of Nvidia Ampere Architecture for High Precision Computing Projects Using Pytorch and CUDA with A100 GPU.</h2>
To ensure optimal performance when using Nvidia’s Ampere architecture for high precision computing projects, leveraging the power of PyTorch and CUDA with the A100 GPU is critical. Here are the steps to follow.
<h3>Installation and Configuration</h3>
Firstly, verify if your system has a CUDA-compatible GPU. You also need to install NVIDIA’s drivers for your graphics card and DirectX if you’re on Windows. Next, install the compatible version of CUDA Toolkit and make sure that the binaries are in your system’s PATH. Here is a command to install CUDA and PyTorch:
pip install torch torchvision torchaudio cudatoolkit=11.0 -c pytorch
<h3>PyTorch Model Optimization</h3>
Secondly, for further boosting computing speed, it is recommended to cast all tensors and neural network modules for single-precision floating point format.
For instance:
model = model.cuda()
input = input.cuda()
This line of code is simply telling PyTorch to transfer the model into the graphic card memory.
<h3>Working with Large-Scale Data</h3>
Utilizing A100’s Multi-Instance GPU (MIG) feature can be quite beneficial if handling multiple data models or jobs. This technology allows for GPU partitioning into as many as seven instances, each acting as an independent device with its own memory, cache, and streaming multiprocessors. The implementation is straightforward:
torch.cuda.device_count()     # Number of GPUs available
torch.cuda.current_device()   # Returns the current CUDA device
torch.cuda.set_device(id)    # Sets the current CUDA device
<h3>Advanced Feature Support</h3>
A100 comes with support for TF32 and FP64 tensor types which are crucial for high precision computations. PyTorch provides built-in functions to deal with this:
my_tensor.float()   # Cast to floating point tensor
my_tensor.double()  # Cast to double tensor
<h3>Performance Tuning</h3>
Consider using automatic mixed precision (AMP) training provided by PyTorch. AMP utilizes both FP32 and FP16 precisions where appropriate ensuring improved performance while maintaining accuracy.
from torch.cuda.amp import autocast

with autocast():
   output = model(input)
<h3>Efficient Memory Management</h3>
Due to the high memory capacity essential for training deep learning networks provided by The A100 GPUs, consider using gradient checkpointing technique. It involves trading compute for memory and helps reduce GPU memory use.
<strong>Important Note</strong>: While these optimizations can hugely enhance computation speed and efficiency for PyTorch on A100 GPU, it is always essential to balance between speed and precision based on specific application requirements.
Refer to the official <a href=’https://pytorch.org/docs/stable/notes/cuda.html’ rel=’nofollow’>PyTorch documentation</a> for more detailed guides on these optimization techniques.
Remember, optimizing machine learning operations requires ongoing adjustments and iterations to find the sweet spot between computational resources and algorithm efficiency.
When it comes to using PyTorch in conjunction with CUDA on an A100 GPU, there are several steps and precautions that one should take. This makes the process efficient, error-free, and increases the utilization capacity of your GPU for high-performance computing.
The first step is to install PyTorch. Remember to correctly specify the version that supports your environment using pip or conda commands like:


