


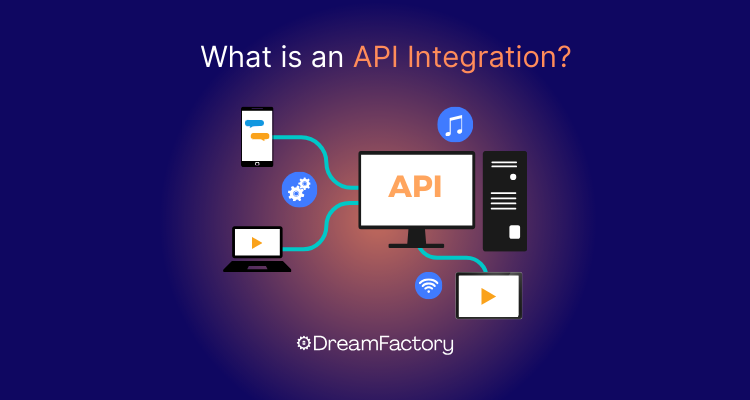
In the interconnected landscape of modern software, Application Programming Interfaces (APIs) are the essential glue holding everything together. They are the invisible workhorses that power our mobile apps, enable complex web applications, and allow disparate systems to communicate seamlessly. From a simple weather widget on your phone to large-scale enterprise microservices, APIs are the foundational contract that enables data exchange and functionality. For any developer, mastering API development is no longer a niche skill but a core competency.
This comprehensive guide will take you on a journey through the world of API development. We will start with the fundamental concepts, walk through building a practical API with code examples, explore advanced techniques like security and error handling, and cover the best practices that separate a functional API from a great one. Whether you are involved in Python development, Node.js development, or full-stack engineering, understanding how to design, build, and debug robust APIs is critical for success.
The Foundations of API Design
Before writing a single line of code, it’s crucial to understand the architectural principles that govern effective API design. A well-designed API is intuitive, predictable, and easy for other developers to consume. The choices you make at this stage will have a lasting impact on the API’s usability and maintainability.
Understanding API Paradigms: REST vs. GraphQL
Two dominant paradigms in the API world are REST and GraphQL. While both can achieve similar goals, they approach data fetching and manipulation differently.
REST (Representational State Transfer) is an architectural style that has been the de facto standard for years. It’s built on the principles of the web itself, using standard HTTP methods to interact with resources. Key concepts include:
- Resources: Everything is a resource (e.g., a user, a product, an order), identified by a unique URI (e.g.,
/users/123). - Statelessness: Each request from a client to the server must contain all the information needed to understand and complete the request. The server does not store any client context between requests.
- Standard HTTP Methods: Actions are performed using verbs like
GET(retrieve),POST(create),PUT(update/replace), andDELETE(remove).
GraphQL, on the other hand, is a query language for your API. Developed by Facebook, it allows clients to request exactly the data they need and nothing more. This solves common REST issues like over-fetching (getting more data than needed) and under-fetching (having to make multiple requests to get all required data). The client sends a single query to a single endpoint (usually /graphql) specifying the structure of the data it requires, and the server responds with a JSON object matching that structure.
The Language of the Web: HTTP Methods and Status Codes
For RESTful APIs, a deep understanding of HTTP is non-negotiable. HTTP methods define the action to be performed on a resource, while status codes communicate the result of that action. Using them correctly is fundamental to creating a clear and predictable API.
- GET: Retrieves a representation of a resource. Safe and idempotent (multiple identical requests have the same effect as one).
- POST: Creates a new resource. Not idempotent.
- PUT: Replaces an existing resource entirely. Idempotent.
- PATCH: Applies a partial modification to a resource. Not necessarily idempotent.
- DELETE: Deletes a specified resource. Idempotent.
HTTP status codes provide crucial feedback to the client, forming the basis for proper error handling and API debugging. They are grouped into categories:
- 2xx (Success):
200 OK,201 Created,204 No Content - 3xx (Redirection):
301 Moved Permanently - 4xx (Client Errors):
400 Bad Request,401 Unauthorized,403 Forbidden,404 Not Found - 5xx (Server Errors):
500 Internal Server Error,503 Service Unavailable
Building Your First REST API: A Practical Walkthrough
Theory is important, but the best way to learn is by doing. Let’s build a simple “To-Do List” API using Python and Flask, a lightweight and popular web framework. This example will demonstrate how to create endpoints to get and add tasks.
Setting Up the Environment
First, ensure you have Python installed, then install Flask using pip:
pip install FlaskCreating Basic Endpoints
Now, let’s create a file named app.py. We’ll use a simple in-memory list to store our tasks for this example. In a real-world application, you would connect to a database.
This code sets up two endpoints: /tasks for retrieving all tasks (GET) and creating a new one (POST).
from flask import Flask, jsonify, request

# Initialize the Flask application
app = Flask(__name__)

# In-memory data store (replace with a database in a real app)
tasks = [
    {"id": 1, "title": "Learn API Development", "completed": True},
    {"id": 2, "title": "Write a technical article", "completed": False},
]
next_id = 3

@app.route('/tasks', methods=['GET'])
def get_tasks():
    """Endpoint to retrieve all tasks."""
    return jsonify(tasks)

@app.route('/tasks', methods=['POST'])
def add_task():
    """Endpoint to add a new task."""
    global next_id
    if not request.json or not 'title' in request.json:
        # Return a 400 Bad Request if the payload is invalid
        return jsonify({"error": "Missing title in request body"}), 400

    new_task = {
        'id': next_id,
        'title': request.json['title'],
        'completed': False
    }
    tasks.append(new_task)
    next_id += 1

    # Return the new task with a 201 Created status code
    return jsonify(new_task), 201

if __name__ == '__main__':
    # The debug=True flag is useful for development but should be False in production
    app.run(debug=True)
To run this API, save the code and execute python app.py in your terminal. You can then use tools like Postman or cURL to interact with your endpoints at http://127.0.0.1:5000/tasks. This simple example highlights core concepts of routing, handling request data, and returning JSON responses with appropriate status codes—a foundational step in any Python development for APIs.
Advanced API Techniques and Critical Considerations
Once you have the basics down, it’s time to address the complexities that arise in real-world applications. These include securing your API, planning for future changes, and implementing robust error handling and debugging strategies.
Securing Your Endpoints: Authentication and Authorization
An unsecured API is a massive liability. You need to control who can access your API (Authentication) and what they are allowed to do (Authorization).
- API Keys: A simple method where a unique key is passed in the request headers. Good for tracking usage but less secure.
- OAuth 2.0: An industry-standard protocol for authorization. It allows users to grant third-party applications limited access to their resources without sharing their credentials.
- JWT (JSON Web Tokens): A compact, URL-safe means of representing claims between two parties. After a user logs in, the server creates a signed JWT containing user information and sends it to the client. The client then includes this token in the header of subsequent requests to access protected routes.
Effective API Debugging and Error Handling
Things will go wrong. A robust API anticipates failures and provides clear, useful feedback. This is where a solid strategy for logging and debugging becomes invaluable. Instead of returning a cryptic 500 Internal Server Error, your API should return a structured error response.
Here is an example of a centralized error-handling middleware in a Node.js Express application. This ensures that all errors are caught and formatted consistently, which is a cornerstone of effective Node.js debugging.
const express = require('express');
const app = express();

// ... your other routes and middleware

// Example route that throws an error
app.get('/problem', (req, res, next) => {
  const err = new Error('This is a simulated server error.');
  err.status = 500;
  // Pass the error to the next middleware in the chain
  next(err);
});

// Custom Error-Handling Middleware (should be the last middleware)
app.use((err, req, res, next) => {
  // Log the full error stack for debugging purposes (e.g., to a file or error tracking service)
  console.error(err.stack); // Important for viewing stack traces

  const statusCode = err.status || 500;
  const errorMessage = err.message || 'Internal Server Error';

  // Send a structured JSON response to the client
  res.status(statusCode).json({
    error: {
      message: errorMessage,
      status: statusCode,
    },
  });
});

const PORT = 3000;
app.listen(PORT, () => {
  console.log(`Server running on port ${PORT}`);
});
This middleware catches errors from anywhere in the application, logs the full stack traces for server-side debugging, and sends a clean JSON response to the client. Tools like Sentry or LogRocket can be integrated for advanced error tracking in production. For frontend developers consuming the API, Chrome DevTools is an indispensable web debugging tool for inspecting network requests and responses.

Best Practices for Robust and Scalable APIs
Building a functional API is one thing; building a high-quality, scalable, and maintainable one is another. Following established best practices will save you and your consumers countless hours of frustration.
Documentation is Not an Afterthought: OpenAPI and Swagger
Your API is only as good as its documentation. If developers can’t figure out how to use it, it won’t be used. The OpenAPI Specification (formerly Swagger) is the industry standard for defining RESTful APIs. It allows you to describe your endpoints, parameters, responses, and authentication methods in a machine-readable format.
Modern frameworks like FastAPI in Python make this incredibly easy by automatically generating interactive documentation from your code.
from fastapi import FastAPI
from pydantic import BaseModel

app = FastAPI()

class Item(BaseModel):
    name: str
    description: str | None = None
    price: float
    tax: float | None = None

@app.post("/items/")
async def create_item(item: Item):
    return item

@app.get("/items/{item_id}")
async def read_item(item_id: int):
    return {"item_id": item_id, "name": "Sample Item"}
With the code above, FastAPI automatically generates an OpenAPI schema and provides two interactive documentation interfaces at /docs (Swagger UI) and /redoc, making exploration and testing simple for consumers.
Performance and Scalability: Caching and Rate Limiting
As your API gains traffic, performance becomes critical. Two key strategies are:
- Caching: Storing the results of expensive operations so they can be served faster on subsequent requests. This can be done at multiple levels: HTTP caching with headers like
ETagandCache-Control, or server-side caching with tools like Redis or Memcached. - Rate Limiting: Restricting the number of requests a client can make in a given time period. This is essential to prevent abuse (intentional or accidental) and ensure fair usage for all clients.
The Role of Testing in API Development
A comprehensive testing strategy is the foundation of a reliable API. The process of testing and debugging go hand-in-hand. You should have:
- Unit Tests: To verify individual components (e.g., a function that validates input) in isolation.
- Integration Tests: To test entire endpoints, making actual HTTP requests to your application and asserting the responses. This is crucial for integration debugging.
Here’s a simple integration test for a Node.js/Express endpoint using Jest and Supertest.
// __tests__/app.test.js
const request = require('supertest');
const app = require('../app'); // Your Express app export

describe('GET /tasks', () => {
  it('should respond with a 200 status code and a JSON array', async () => {
    const response = await request(app)
      .get('/tasks')
      .expect('Content-Type', /json/)
      .expect(200);

    // Assert that the body is an array
    expect(Array.isArray(response.body)).toBe(true);
  });
});
Automating these tests in a CI/CD pipeline ensures that new changes don’t break existing functionality, providing a safety net for your development process.
Conclusion: The Journey of API Development
API development is a multifaceted discipline that blends architectural design, software engineering, and a deep understanding of web protocols. We’ve journeyed from the foundational principles of REST and HTTP to the practical implementation of endpoints in Python and Node.js. We’ve also explored advanced, critical topics such as security, versioning, and robust error handling, recognizing that a solid API debugging and error tracking strategy is what makes an API truly production-ready.
By embracing best practices like comprehensive documentation, strategic performance optimizations, and a rigorous testing culture, you can build APIs that are not just functional but also scalable, secure, and a pleasure for other developers to use. The journey doesn’t end here. The next step is to take these concepts and apply them: build your own API, explore a new framework like FastAPI or NestJS, and dive deeper into the world of API security and design patterns.