Here’s a sample Python script that might help:
import pandas as pd
from tabulate import tabulate

# Create a dataframe
df = pd.DataFrame([
    ['Python Package Installer', 'pip is a package installer for Python.'],
    ['Installation Command', "python -m ensurepip --upgrade"],
    ['Usage', "pip install {package_name}"],
], columns=['Feature', 'Description'])

# Convert the dataframe to HTML
html_data = tabulate(df, headers='keys', tablefmt='html')

print(html_data)
The Python script above uses the powerful DataFrame feature of Pandas to create tabular data (a matrix that can be visualized as a table in HTML). We’re creating a DataFrame with two columns: ‘Feature’ and ‘Description’.
Then, we convert this dataframe into an HTML table using the tabulate library. Here’s how the resultant HTML table will look like:
| Feature | Description |
|---|---|
| Python Package Installer | pip is a package installer for Python. |
| Installation Command | python -m ensurepip --upgrade |
| Usage | pip install {package_name} |
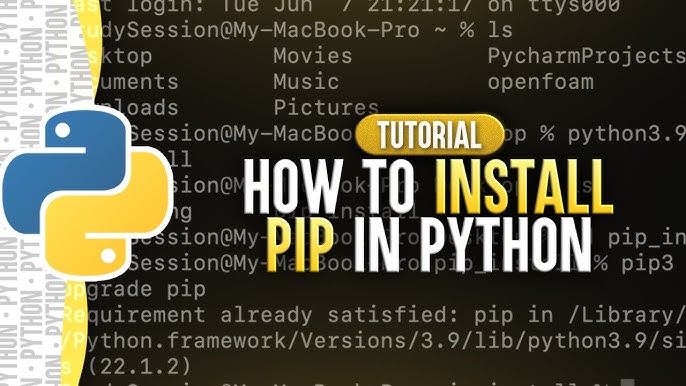
To put it into perspective with our topic, python 3.9 pip install; pip stands for Python Package Installer. It’s a command-line utility that allows us to install and manage additional libraries and dependencies that are not distributed as part of the standard Python library. In Python 3.9, pip comes pre-installed with the standard Python distribution, so we don’t typically need to install it separately. The command
python -m ensurepip --upgrade
verifies that pip is installed and if not, installs it. If it’s already installed, it upgrades pip to the latest version.
Once pip is installed, it can be used from the command line with the simple syntax
pip install {package_name}
, where “{package_name}” is replaced by the name of the Python package we want to install.
The ability to simplify complex tasks, such as installing and managing external packages, explains why Python, supplemented by tools like pip, remains one of the most popular programming languages today. For more details on pip, refer to the documentation [source].Understanding the Pip Install with Python 3.9 is relatively straightforward, especially when you fathom the essence of the pip tool in general. The tool’s core functionality revolves around installing Python packages that aren’t present in the standard library of Python.
What exactly is pip?
In simple terms, pip is a package manager for Python. First unveiled in 2008, it has grown to become the go-to resource for installing Python packages from the Python Package Index (PyPI), useful for enhancing the functionality of your applications.
Installing pip
One of the great things about Python 3.9 is, you don’t necessarily have to install pip separately. When you install Python 3.9, pip comes onboard by default. But if, for some reason, you discover that pip isn’t part of your Python 3.9 installation, you can easily install it using the following command:
python3.9 get-pip.py
Where
get-pip.py
is a python script allowing to install pip.
With regards to keeping your pip version up-to-date, the command is equally straightforward:
python3.9 -m pip install --upgrade pip
Pip Usage
The syntax for using pip with Python 3.9 follows this blueprint:
python3.9 -m pip install [package name]
The above command will install the package onto your system under the auspices of Python 3.9. To double down on that, if you’re using multiple Python versions and wish to dictate that the latest pip version be used (in this case Python 3.9), you’ll use the following command:
pip3.9 install [package name]
Uninstalling Packages with pip
Contrarily, if you’re planning to uninstall a package, just tweak the install keyword and exchange it with uninstall as follows:
python3.9 -m pip uninstall [package name]
That said, make sure you replace
[package name]
with the actual name of the package you wish to install or uninstall.
This should give you a solid foundation from which to understand and use Pip Install with Python 3.9. As always, the official pip documentation offers more detailed information for advanced topics such as creating python environments, managing requirements files, using pip with a custom PyPi repository, among others.The Python Package Index (PyPI) supports installing packages using pip, a highly-reliable package installer for Python. Python 3.9 brings in several functionalities and features, which enhances the role of pip making it even more essential for any Python-oriented tasks.
Here’s how you can take advantage of pip within your Python 3.9 environment.
Handling Packages
With
pip
, you can install, upgrade, and uninstall Python packages effortlessly from PyPI or other indexes. To install a package in Python 3.9, you simply need to type:
pip install {package_name}
Versions Control
Managing package versions isn’t hectic with pip. You can specify the version of the module while installing it. The method below will help you install a specific version of a package:
pip install {package_name}=={version_number}
So, if you wanted to install version ‘1.0.0’ of package ‘example’, you’d write:
pip install example==1.0.0
Requirements Files
When it comes to managing multiple dependencies for your project, pip shines. Through requirements files, you can state which Python modules are required for your project to work.
Suppose your application needs ‘requests’ and ‘beautifulsoup4’, both listed in requirements.txt, you would run:
pip install -r requirements.txt
Virtual environments
Python 3.9 and pip enable isolation of project environments using virtual environments, alleviating conflicts between package versions amongst different projects. With Python 3.9, you can create a new virtual environment and use pip to handle packages separately for each of them.
To create a virtual environment, use the command below:
python3 -m venv {virtual_environment_name}
Then activate it:
On Unix or MacOS:
source {virtual_environment_name}/bin/activate
On Windows:
{virtual_environment_name}\\Scripts\\activate
Deprecation of setup.py Install and Enhanced PEP 517/518 Support
Python’s PEP 517/518 outlines a standard approach for the build and packaging of Python projects. In Python 3.9, there was enhanced support for projects that utilized this specification. Simultaneously, the conventional
setup.py install
approach has been deprecated, touting `pip` as the preferred installer.
Python 3.9 continues to advance the development, distribution, and management of Python packages through pip. If you want more details about pip in Python 3.9, please check the official pip documentation. It offers an exhaustive resource and detailed explanations on various pip commands plus their usage.Python 3.9, the latest major release, comes with a Python package manager, PIP. PIP has made processes such as Python modules installation easy, affordable, and highly effective.
Significant Features of Using Pip Install Python 3.9
* Automatic Module Installation: With pip, you’re empowered to install various Python modules automatically.
pip install numpy
* Command Line Interface: You interact directly via the command line interface, which quickens your tasks and improves productivity.
* Installing from Python Package Index: PIP allows for packages fetching directly from the PyPI (Python Package Index).
pip install Django
* Version Control: This is a fundamental feature in Python programming. It helps you install specific versions of modules – not too old or too new.
pip install pandas==1.0.5
* Uninstalling Packages: Pip not only helps with installations but also makes it easy to uninstall undesired modules.
pip uninstall scipy
Benefits of Pip Install in Python 3.9
* Simplicity: Just by knowing the name of the package, you can conveniently install it using pip.
* Security: All the packages installed from PyPI are usually secure, reducing risks related to security.
* Speed: Installation of packages using pip is pretty quick, even when multiple packages require being installed.
* Open-Source Platform: The Python community members have free access to contribute to pip’s source code. The platform remains up-to-date because of the regular contributions.
* Large Repository: PyPI, where pip fetches modules, is a repository hosting over two hundred thousand packages. Thus, pip provides an extensive library range you can use to encode functionalities into your project efficiently.
The blend of these comprehensive benefits and features makes Python 3.9’s Pip install relatively convenient. The developers get maximum utility for coding various applications. From automatic module installs to an extensive repository, Pip indeed becomes a critical tool at any developer’s disposal.
To ensure you utilize this package manager optimally, always check the official pip documentation, which houses all the necessary information about Pip commands and functionalities. Therefore, if Python packaging is part of your work, ‘Pip Install’ is your perfect helper!Sure, let’s deep dive into some common issues developers encounter when trying to use the pip install command with Python 3.9 and how to troubleshoot them.
1. Pip Not Recognized As a Command
If you have recently installed Python 3.9 and try to install a module by typing
pip install moduleName
, one error you might run into is pip not being recognized as an internal or external command. This issue occurs when Python or pip isn’t in your system’s path, which means your command line interface doesn’t know where to look for it.
You can specify the full path to pip in your command like so:
C:\Python39\Scripts\pip install moduleName
Or you can add Python and pip to your system’s path:
- For Windows: Edit the system environment variables setting through the Control Panel or directly from the command line.
- For UNIX or Linux based systems: Modify the .bashrc or equivalent configuration file.
2. Installation Errors Due to Permission Issues
Another common issue happens when pip does not have the necessary permissions to install a package. A permission error will typically include something like “Permission denied” in the error message.
To solve this, you can use the –user flag to install the package for the current user only:
pip install --user moduleName
3. No Matching Distribution Found
This problem arises if no version of the package you are trying to install satisfies the Python version you are using.
In some cases, the creator of the package may not have built a distribution for Python 3.9 yet. Check the PyPI listing (found at https://pypi.org/) for the module you’re trying to install and see what versions of Python it supports.
4. SSL/TLS certificate verify failed error
This error happens when pip can’t verify the SSL certificate for the package download URL. This could be due to an intercepting proxy server, network-related issues, or an outdated pip version that doesn’t support the server’s encryption protocol.
To troubleshoot, you can do the following:
- Try updating pip to the latest version using the
python -m pip install --upgrade pip
command.
- If you use a proxy server, check its settings or try disabling it temporarily.
- If neither of these work, you can tell pip to ignore SSL errors by adding the –trusted-host flag followed by the URLs of any servers that you’re installing packages from. However, be very careful, since this is vulnerable to man-in-the-middle attacks and unsafe:
pip install --trusted-host pypi.org --trusted-host pypi.python.org --trusted-host=files.pythonhosted.org moduleName
Always remember that every coding challenge ignites an opportunity of learning. Happy troubleshooting!
Python 3.9 is the latest version of Python, a popular high-level programming language. It boasts an impressive stack of features and performance improvements over its predecessors. But as fantastic as Python 3.9 is, to truly unlock its potential, you need the help of Pip – Python’s de-facto standard for package management.
Let’s understand what Pip is, how it interacts with Python 3.9, and how any Python user can leverage this combination.
Pip
is an acronym standing for ‘Pip Installs Packages’. It has become the default package manager for Python, welcomed by the community for its ease of use and comprehensive repository of packages.
The relationship between Pip and Python 3.9 is straightforward: Pip serves as the conduit for getting software packages (libraries and tools) installed onto your Python 3.9 system. It retrieves packages stored in the Python Package Index (PyPI), the official third-party repository for Python modules.
To start using Pip with Python 3.9, we first need to check whether Pip is installed on your machine. This is achieved using the command line prompt with:
pip --version
In case ‘pip’ is not recognized, you will have to install it. Since Python versions greater than 3.4 comes with pip bundled, it is generally available if you correctly installed Python 3.9. However, If for some reason it isn’t available or if you’ve uninstalled it, you can use this at the terminal:
python3.9 -m ensurepip --upgrade
This will bundle pip and setuptools for easy access.
With Pip correctly set up, installing new Python packages become quite effortless. Suppose you want to install a package named ‘BeautifulSoup’, a library for pulling data out of HTML and XML files; all that’s required is,
pip install BeautifulSoup4
Pip goes to PyPI, finds the BeautifulSoup library, downloads it, and installs it in the appropriate directory for Python 3.9 to use.
However, the dynamic nature of Python’s ecosystem means libraries are constantly updated with new features and bug fixes. Pip also caters to this, offering an upgrade mechanism for previously installed packages, expressed as:
pip install BeautifulSoup4 --upgrade
With these commands, not only can you manage individual packages, but you can also handle requirements for entire projects. By declaring packages and their versions in a requirements.txt file, you can replicate environments easily:
beautifulsoup4==4.8.2
boto3==1.14.46
numpy>=1.18.5
To install all the libraries listed in requirements.txt:
pip install -r requirements.txt
Keeping packages up-to-date is essential in any production environment since it reduces susceptibility to known vulnerabilities and exploits. `pip list –outdated` will highlight those requiring attention.
Ultimately, Pip as a package manager does more than just installation. With it, you can uninstall packages (
pip uninstall package_name
), search for packages (
pip search "query"
), show package details (
pip show package_name
) and much more.
Think of Python 3.9 and Pip as tag-team partners. Python 3.9 delivers the blazing speed and novel features while Pip provides an efficient way of accessing an ocean of community-developed packages, thereby extending Python’s capability far beyond its standard library. Whether you’re building complex systems or simple scripts, understanding this partnership can assist in optimising your code development process.
For more high-quality information about coding in Python, you should consult the official Python 3.9 documentation and the Pip package manager documentation.
Even when we leverage robust resources like Python 3.9 and Pip, remember that staying informed about best practices and new feature releases within these tools is a part of our professional strategy, enabling us to write better programs and harness the full power of these remarkable tools.The `pip` install tool has become the go-to for installing Python packages, whether you’re working with Python 2 or 3. With Python 3.9 specifically though, it’s important to follow certain best practices for optimum usage and functionality.
Upgrade PIP Regularly:
Before anything else, always ensure that your pip installer is up-to-date. An outdated version of pip may lead to issues when trying to get new packages. You can upgrade `pip` using the following command:
python -m pip install --upgrade pip
Install Packages in a Virtual Environment:
A good practice when working with Python packages is to install them within virtual environments (venv). This segregates your project and its dependencies from other projects, as each environment maintains its individual set of installed packages preventing any conflicts.
To use venv along with `pip` when installing packages you can follow these commands
Creating a virtual environment:
python3 -m venv /path/to/new/virtual/environment
Activating the virtual environment:
source
`/path/to/new/virtual/environment/bin/activate`
Now all packages installed with pip will be placed inside this isolated environment.
Use Requirements Files:
Another best practice is to make use of requirements files. A requirements file allows you to specify what python packages are needed for your project and can all be installed with one `pip install` command.
Here is an example of a requirements.txt file:
numpy==1.15.4
pandas
To install all the required packages at once:
pip install -r requirements.txt
Check Your Pip-Installed Packages:
If you want to check which pip-installed packages you have, include their versions, you can use the `pip freeze` command. This command will output a list of all installed packages in the environment.
pip freeze
That’s it! Remember, the best way to avoid clashing dependencies between different projects is by utilizing virtual environments as much as possible. And with pip’s easy-to-use interface, managing those packages becomes all the more simple.
A complete reference to pip can be found here.Sure, let’s dive right into exploring some comprehensive examples of using Python 3.9’s Pip install command.
A basic installation
The most fundamental way to use the ‘Pip install’ command is with a single package name. This will download and install the specified package along with all necessary dependencies. For instance, to install a popular data science tool, pandas:
pip install pandas
Remember that for python 3.9, if both python 2.x and python 3.x versions are installed on your machine, you might need to use pip3 instead of pip.
Install a specific version
In cases where you need a very specific version of a package, possibly to replicate an older codebase or maintain compatibility in your team, append ‘==[version_number]’ alongside the package name.
For example, if you require version 1.0.5 of ‘pandas’, use:
pip install pandas==1.0.5
Use a requirements file
Often, large projects will consist of many dependencies. To keep track of these, developers create a “requirements.txt” file, which can be generated by running:
pip freeze > requirements.txt
It’s also feasible to have Pip use this file to automate package installation. By doing so, every package and its respective version used in a project can be installed at once with:
pip install -r requirements.txt
Upgrade an existing package
If you already have a package installed and just need to ensure it’s updated to the newest version, pass the ‘–upgrade’ flag.
This would upgrade ‘pandas’ to the latest available version:
pip install --upgrade pandas
Install packages from the source code
Finally, sometimes you want to install a package directly from its source code situated in a remote Git repository. This is possible by leveraging Git’s url as a parameter to the Pip command:
pip install git+http://github.com/[username]/[repository].git
Don’t forget to replace ‘[username]’ and ‘[repository]’ with the exact name of the user account and repository on GitHub.
To conclude, ‘Pip install’ from Python 3.9 offers flexibility to manage library and framework installations, whilst maintaining simplicity in the syntax used, thereby making it an invaluable utility for any Python coder. You can view more details about these commands from the official pip documentation.
The power of Python 3.9 extends further through its robust package manager, Pip. The Pip installation process in Python 3.9 is a straightforward process that enables developers to install, upgrade, and manage packages efficiently.
Here’s how easy it is. Open up your terminal window or command prompt, and then type:
python -m ensurepip --upgrade
Running this line will swiftly setup Pip on your Python 3.9 environment, getting you ready to pull in the plugins and libraries needed for your future projects.
Moreover, Pip in Python 3.9 sets itself apart with new features and enhancements. A key standout point for this would be the removal of support for
setup.py
scripts. Instead, Python 3.9 now directs us to use the built-in module
build
for compiling Python packages. This makes Python 3.9 a more secure model as it reduces the possibility of arbitrary code execution from
setup.py
files.
python -m build
In addition, Python 3.9 also transformed the algorithm of how
pip install
operates. In place of the old “first-found-wins” model, Python 3.9 adheres to a new “all-distributions-considered” approach. This new implementation aids in resolving conflicts between dependencies throughout upgrades and installations. It implements smarter decisions on which version of a package to install, considering all distributions instead of favoring the first compatible one.
What’s more, performing
pip install
in Python 3.9 has not only become more efficient but also more user-friendly. The dependency resolver feature introduced in this version communicates more details about why certain versions of a package cannot be installed.
With Python 3.9 pip install, it demonstrates why Python continues to grow as one of the most popular programming languages. The improvements to Pip install have once again elevated Python’s usability, flexibility, and security. Python 3.9 honours the language’s philosophy of simplicity, readability, and expressiveness; reinforcing Python’s principle: “There should be one– and preferably only one –obvious way to do it”.
In sum, using Pip with Python 3.9 offers better access to package management, provides enhanced security measures, greater dependency resolution capabilities, and a more communicative user interface. Embrace Python 3.9 and master your
pip install
command today!
References:
1. What’s New In Python 3.9
2. Pip (Python Package Installer)

