| Step Description | Action Required |
|---|---|
| Check Current Version of Python | Execute
python3 --version |
| Install Specific Version | Execute
sudo apt-get install python3.6 |
| Configure python3 to use Python 3.6 | Execute
sudo update-alternatives --install /usr/bin/python3 python3 /usr/bin/python3.6 1 |
| Update System Alternatives | Execute
sudo update-alternatives --config python3 Then select the number corresponding to python3.6 version when asked. |
| Verify New Python Version | Execute
python3 --version |
We’re essentially checking the current version of Python, installing version 3.6.5 via apt package manager, then updating the system alternatives to point to this version. The core part here is the use of `update-alternatives`. It’s used to maintain symbolic links determining default commands. The ubuntu environment makes use of certain aliases and we are telling the system to redirect all python3 aliases to python3.6.5 instead of python3.7.5. Important to remember is the involved process also requires root user permissions due to the nature of changes. You’ll verify your setup by checking the Python version after the downgrade.
Overall, downgrading Python necessitates care as some pre-existing applications on the Ubuntu system may rely on the later version of Python. Always make sure to check dependencies before conducting this sort of operation. Also, setting up pyenv or virtual environments can help manage different Python versions for different projects without the need for a system-wide downgrade
The Python programming language, much like any other development foundation in the tech space, undergoes various re-engineering processes to introduce new features, revamp existing ones, or fix bugs. The 3.7.5 and the 3.6.5 versions of Python exhibit some disparities, although they primarily adopt the fundamental elements of the 3.X model.
Difference ranges from enhanced garbage collection system in 3.7.5 version to introduction of new modules or deprecation of certain functions. Comprehending these differences helps you, as a developer, make better use of either version, based on your particular requirements.
Moving onto downgrading the Python version from 3.7.5 to 3.6.5 on Ubuntu, here is how it can be done:
- Uninstalling Python 3.7.5: Before installing a lower version, Python 3.7.5 that was installed via
apt
needs to be uninstalled.
sudo apt-get remove python3.7
- Installing Python 3.6.5: After the previous version has been uninstalled you can install the desired version, 3.6.5, using the below commands. It’s important to update apt-get before this installation to fetch packages from the latest repositories:
sudo apt-get update
sudo apt-get install python3.6
- Updating Python Alternatives: It is also essential to adjust the alternatives system for Python so that the newly-installed version gets accorded as the primary interpreter. This means programs and scripts you throw at Python will run on the specified version by default:
sudo update-alternatives --install /usr/bin/python3 python3 /usr/bin/python3.6 1
- Confirming the Python Version: Having completed these steps, you can now ensure that Python 3.6.5 is the main version under use by your operating system:
python3 --version
The response should be:
Python 3.6.5
Please be aware that some Python applications on your Ubuntu system may specifically need Python 3.7.5 to function correctly. Therefore, please proceed with caution when downgrading Python.
The process highlighted for downgrading Python encapsulates general guidelines. Always remember to back up important work, details, or configuration setups related to the Python environment currently in use, prior to the commencement of the process. This way, there are means of data recovery if something unexpected occurs. Also, considering the complexity involved, softwares like Anaconda could help in managing different Python versions efficiently.
If you want to explore more about Python’s version differences, you can refer here.
So, you currently have Python 3.7.5 installed on your Ubuntu system and want to switch back to Python 3.6.5? We can definitely work on that!
But first, it’s essential to highlight some important differences between the two Python versions.
Python 3.7.5 vs. Python 3.6.5
Python 3.7.5 provides some important new features compared with 3.6.5:
– The ‘breakpoint()’ function: This aids tremendously in debugging by providing an explicit way to trigger a debugger without needing manually insert tracepoints.
– Import improvements: 3.7.5 makes dynamic classes and modules cleaner and faster.
– Data classes (PEP 557): Data classes are a decorator and functions for automatically adding special methods in user-defined classes.
However, these enhancements might not always be necessary. In fact, older projects or dependencies might even experience problems with these new features. Thus, reverting back to Python 3.6.5 can often be beneficial.
Now, let’s move onto how you can downgrade your Python version.
Switching from Python 3.7.5 to Python 3.6.5 on Ubuntu
The general process involves removing the current version and then installing the one you require. However, given the complexities of dealing with Python installations, I highly recommend using pyenv instead. It greatly simplifies managing multiple Python versions on a single machine.
Start by installing the prerequisites and then pyenv itself:
sudo apt install -y make build-essential libssl-dev zlib1g-dev libbz2-dev \
libreadline-dev libsqlite3-dev wget curl llvm libncurses5-dev libncursesw5-dev \
xz-utils tk-dev libffi-dev liblzma-dev python-openssl git
curl https://pyenv.run | bash
You will need to add Pyenv to your shell startup script:
echo 'export PYENV_ROOT="$HOME/.pyenv"' >> ~/.bashrc
echo 'export PATH="$PYENV_ROOT/bin:$PATH"' >> ~/.bashrc
echo -e 'if command -v pyenv 1>/dev/null 2>&1; then\n  eval "$(pyenv init -)"\nfi' >> ~/.bashrc
exec "$SHELL"
To install Python 3.6.5, simply type:
pyenv install 3.6.5
Set Python 3.6.5 as your global Python version:
pyenv global 3.6.5
Check your installation with:
python --version
This should output ‘Python 3.6.5’, confirming that your workaround was successful. With pyenv, you can quickly switch between different Python versions, making it easier to handle projects with varying requirements.
Hope this helps! Happy coding and I’m PEP-tastically excited to see you navigate Python like a pro.
Downgrading your Python version on Ubuntu involves a sequence of steps that need to be executed correctly. Here’s how you can downgrade your Python 3.7.5 installation to Python 3.6.5:
Get the Correct Package
The first step is to get the correct package for Python 3.6.5. You’ll want to avoid getting the generic “latest version” package since that’ll probably result in you receiving version 3.7.5 or even something newer. The safe bet is to head to the official Python website and download the specific package you need.
Remember to select the OS-specific download link. For Ubuntu, this will likely be the GNU/Linux platform.
Once it’s downloaded, you can move directly to the next stage.
Navigate to the Downloaded File
Generally, any files you’ve downloaded will end up in your Downloads directory. Unless you’re doing some fancy file management, you’ll want to open up your terminal and navigate to this directory with the command:
cd ~/Downloads
Extract the File
Your downloaded file will be compressed to save space and make the download go faster, which means the next step is to extract the contents. You can do this by running the following command:
tar -xvf Python-3.6.5.tgz
In the above sequence, the ‘-xvf’ is telling the ‘tar’ command to eXtract the Verbose File (hence ‘x’, ‘v’, ‘f’).
Navigate to the Extracted File
Now that you have your desired file extracted, you now have to navigate to this new directory. More often than not, the extracted directory will have the same name as the file you’ve just extracted (minus the .tgz extension). So, if we stick with our example, you’d go to the Python-3.6.5 directory using the cd command:
cd Python-3.6.5
Install the Older Version
At this point, you’re finally ready to install an older version of python (in this case, Python 3.6.5). You can do so by executing the following commands:
./configure
This command prepares Python 3.6.5 for installation on your computer,
make
This compiles the source code to create executable binaries.
sudo make altinstall
This installs Python 3.6.5 into an alternate location. It also avoids overwriting the existing installation of Python (which might be used by system applications).
Referencing Your New Python Install
Now that Python 3.6.5 is installed, you can start using it by referencing it in your scripts or in the terminal as python3.6 instead of just python:
python3.6 example.py
…with ‘example.py’ being your script that you want to run.
A Note About Virtual Environments
If you plan to switch between Python versions often, you might consider setting up virtual environments for each one. This way, you’re not constrained to only one version of Python for all your projects.
This guide should help you accomplish the task of downgrading from Python 3.7.5 to Python 3.6.5 on Ubuntu.
The information provided here was derived from guides and articles provided at Python.org and the Ubuntu documentation found at Ubuntu.com.
While downgrading Python from version 3.7.5 to 3.6.5 could seem like a straightforward task, it’s actually fraught with potential issues. Here is a quick breakdown of what you might run into during this process and how best to handle them.
1. Different versions of Python have different features and methodologies. For instance, Python 3.7 introduced new features such as context variables and data classes, which are not available in Python 3.6 (source). Therefore, if you’ve written code that leverages these new features in Python 3.7.5 and then downgrade to Python 3.6.5, your code may no longer function correctly.
# Example using Data Classes (Python 3.7 feature)
@dataclass
class Point:
    x: float
    y: float
2. PyPi packages that you’ve been using in Python 3.7.5 may not be compatible with Python 3.6.5; compatibility largely depends on how the package has been written and which version of Python it supports. If you’re using any such packages, after downgrading, you should thoroughly test them to ensure they work correctly.
To proceed with the downgrade, you can follow these steps:
– Remove Python 3.7.5 using Ubuntu’s package manager:
sudo apt-get remove python3.7
– Now install Python 3.6.5:
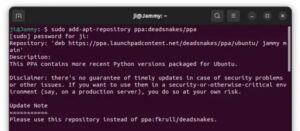
sudo add-apt-repository ppa:deadsnakes/ppa
sudo apt-get update
sudo apt-get install python3.6
This will install Python 3.6.5 on your machine.
– Confirm installation by checking Python’s version:
python3 ––version
On successfully performing these operations, your system will return Python 3.6.5 as the installed Python version.
However, to keep potential issues at bay, you could consider using a version manager for Python like pyenv. Frame pyenv into your development workflow to avoid the hustle of installing and uninstalling different versions of Python. It allows you to easily switch between Python versions depending upon individual project requirements thereby reducing incompatibility issues.
# Install pyenv
curl https://pyenv.run | bash

# Add these lines to ~/.bashrc
export PATH="/home/$USER/.pyenv/bin:$PATH"
eval "$(pyenv init -)"
eval "$(pyenv virtualenv-init -)"

# Restart the shell
exec $SHELL

# Install Python versions
pyenv install 3.7.5
pyenv install 3.6.5

# Set global Python version
pyenv global 3.6.5
Remember, while downgrading Python version might solve some immediate issues, it’s important to factor in long-term implications and compatibility considerations. Always make sure the Python version matches the requirements of your overall project ecosystem.
Negotiating the nuances of compatibility between software versions can get tricky. One such scenario is when you have to adjust to an older version of Python on Ubuntu for certain application requirements. Let’s say you have Python 3.7.5, and you need to drop down to Python 3.6.5. While it may seem counterintuitive given that newer versions generally offer improved functionality and bug fixes, there are legitimate reasons for needing this regression, such as a specific project or tool insistently requiring Python 3.6.5.
Here’s your go-to strategy for getting Python 3.6.5 set up:
The first step would be setting up the environment, and then adopting the Python version you require. This switch doesn’t necessarily mean uninstalling and then reinstalling Python. A more straightforward and less destructive way to achieve this is by using a virtual environment. You get the efficiency of multiple versions of Python, running independently so they don’t conflict with each other.
sudo apt-get install python3.6-venv
python3.6 -m venv env
source env/bin/activate
Python’s venv module allows you to create self-contained ‘virtual environments’ with their own version of Python and its packages, isolating your project from potentially damaging system-wide installations.
You should also remember to check if your system already has Python 3.6 installed by using the command:
python3.6 --version
If Python 3.6 isn’t already installed, you’ll need to download and install it for Ubuntu via the terminal:
sudo add-apt-repository ppa:deadsnakes/ppa \
sudo apt-get update \
sudo apt-get install python3.6
Once Python3.6 is installed, create a new project-specific environment by using:
python3.6 -m venv my-project-env
This approach essentially creates a virtual list of Python installations in which Python 3.6.5 operates independently without breaking anything else. This construct provides flexibility to juggle with different versions of Python when needed, promoting ease of development across various projects.
Another handy tool is Pyenv, a simple, powerful, cross-platform tool for managing multiple Python versions. To install Pyenv, you can run:
curl https://pyenv.run | bash
And then follow its instructions to finish. Once done, it’s trivial to install the version you need (in your case Python 3.6.5):
pyenv install 3.6.5
And then set it as the global (system-wide) default:
pyenv global 3.6.5
In both cases, Pyenv allows switching between Python versions on a per-shell basis, or globally every time you open a terminal window. It’s robust and compliments the workflow of a Python developer well.
To summarize, it is possible to revert your Python version on Ubuntu seamlessly without taking drastic measures like completely uninstalling current Python versions. These methods enlist best practices and ensure longevity and sustainability of your Python projects.
Downgrading Python versions, such as from 3.7.5 to 3.6.5 on Ubuntu, often involves complex processes and careful understanding of dependency management. This is where tools like Anaconda significantly play a role in making it easier and more manageable.
Role of Anaconda
Anaconda is a free and open-source distribution of the Python and R programming languages used for scientific computing, that aims at simplifying package management and deployment. The tool during the downgrade process has the following essential roles:
- Anaconda encompasses a suite that can efficiently manage Python distributions on your system. It allows developers to use different Python versions without conflicts.
- It swiftly and seamlessly handles the Python virtual environments and associated packages, thus you don’t have to worry about version discrepancies or dependencies.
- Anaconda supports the functionality of creating separate environments for different Python versions and even separates packages if needed.
- It also provides strong support in maintaining organized installations across multiple environments thereby preventing overlapping dependencies that directly influence the downgrade process.
The Downgrade Process
Incorporating Anaconda into your workflow makes downgrading Python an uncomplicated task. Here’s how you can downgrade your Python version using Anaconda:
- Create a new environment with specific Python version:
Using theconda
command line to create a new environment specifically for Python 3.6.5:
conda create -n myenv python=3.6.5
- Activate environment:
Afterwards, activate the created environment using this command:
conda activate myenv
In this script, replace ‘myenv’ with the name of the environment you want to activate. Once the environment is activated, you’ll be switched over to the specified Python version, in this case, 3.6.5.
The process mentioned above works by leveraging Anaconda’s robust package and environment management capabilities. Creating separate environments allows parallel Python versions installations thus averting collisions.
For reference, you can refer to the official Anaconda Documentation.
Notice that this process does not technically “downgrade” the overall Python version of your system. Instead, it lets you work within an isolated sandbox-style environment that uses the desired Python version (in this case 3.6.5). This way, system-wide configurations are untouched ensuring stability while still allowing flexibility for development purposes thanks to our handy friend, Anaconda.Restoring the functionality of your code after switching from Python 3.7.5 to 3.6.5 on Ubuntu is significant to ensure your application or software runs smoothly without any hitches. A downgrade will accommodate the changes in syntax, features, built-in functions, and libraries that have occurred between these two versions.
Downgrading Python:
First step involves using a package management system such as apt-get for Ubuntu.
$ sudo apt-get install python3.6
Set the preference for Python 3.6 as default by updating the alternative configurations:
$ sudo update-alternatives --install /usr/bin/python3 python3 /usr/bin/python3.6 1
Verify if Python 3.6 is set as default using:
$ python3 -V
Migrating Code:
On successfully downgrading, you would need to revisit your code making necessary changes for compatibility with Python 3.6:
- Data Classes: You may need to replace data classes introduced in Python 3.7 with traditional class declaration as this feature is not available in Python 3.6.
- Built-in Breakpoint: The handy built-in breakpoint() function for debugging was a new feature in Python 3.7. For Python 3.6, revert to using the import pdb; pdb.set_trace() approach.
- Python 3.7’s New Syntax: If you used the ‘async’ and ‘await’ keywords at the top level in your code, replace them with asyncio.run(), since top-level async/await was only implemented in Python 3.7 onwards.
When it comes to library dependencies, any library that strictly requires Python 3.7, won’t work with Python 3.6. Check each library’s requirements and find an equivalent replacement if needed. Consider using virtual environments via venv or Anaconda to isolate library versions per project to avoid conflicts.
Future-proofing Your Project:
Once you have restored the functionality, consider documenting the compatible Python version and necessary libraries required for your code/project using ‘requirements.txt’ or ‘Pipfile’.
Though the above steps should help restore functionality of a Python project after a downgrade from version 3.7.5 to 3.6.5, you might encounter specific issues contingent on your code usage which are unique and might require the consultation of the respective library documentation or StackOverflow Q&A relevant to that particular issue.
Downgrading from Python 3.7.5 to Python 3.6.5 on Ubuntu entails a process that requires comprehensive understanding reflected in four main steps. Here are the condensed guidelines:
1. Python versions removal
2. Installing required Python version
3. Set it as default and
4. Lastly, verifying installation
Firstly, start the process by uninstalling your current Python version (Python 3.7.5) by using the command:
sudo apt-get remove python3.7
Secondly, regain your desired Python version (Python 3.6.5). Unfortunately, Python 3.6.5 is not readily available in Ubuntu’s package archives. Therefore, you have to get it from a third-party source. Follow these commands:
wget https://www.python.org/ftp/python/3.6.5/Python-3.6.5.tgz
tar xvf Python-3.6.5.tgz
cd Python-3.6.5
./configure --enable-optimizations
make -j8
sudo make altinstall
Thirdly, after compiling and installing Python 3.6.5, set Python 3.6.5 as the default for your system by updating the symbolic link with the command:
sudo update-alternatives --install /usr/bin/python3 python3 /usr/local/bin/python3.6 1
Finally, affirm that you have managed to downgrade your Python by checking the Python’s version running on your Ubuntu box:
python3 --version
Supposing you’ve followed these instructions meticulously, you should see “Python 3.6.5” as your response. Adapting this approach will keep your Ubuntu system updated with your chosen Python version without creating any code-breaking changes. It is a handy trick for any coder looking to switch between Python versions to suit specific project requirements.
Remember, along with downgrading Python, it’s imperative to ensure all dependencies are also compatible with the new setup. With Python 3.6.5 now the standard language on your machine, all packages installed henceforth through pip will be relative to this version. Should you require additional assistance with transitioning from Python versions, refer to Python’s official installation guide. Happy Python Coding!


